By Civenge
Introduction
Welcome to Minion Masters! If you are reading this game guide, then you have found a wonderfully built free to play game created by BetaDwarf Entertainment. Minion Masters is free to play and can be found here on steam: Download Minion Masters. As of the first version of this guide, I have 600 hours into the game, most of which can be seen over at https://www.twitch.tv/civenge as a little shameless self promotion. With that done, let’s talk about Minion Masters.
In Minion Masters you play either solo or as a two man team, with the sole objective to destroy the enemy tower whilst protecting your own tower. Each player picks a Master, who has a unique set of abilities with their own strengths and weaknesses. Each player picks a deck of 10 unique cards, not counting wildcards, more on that later. Your deck will cycle through these cards in the order they are played, with the only random part being the initial starting order. You are guaranteed to cycle through every card within the first 1 or 2 minutes of gameplay.
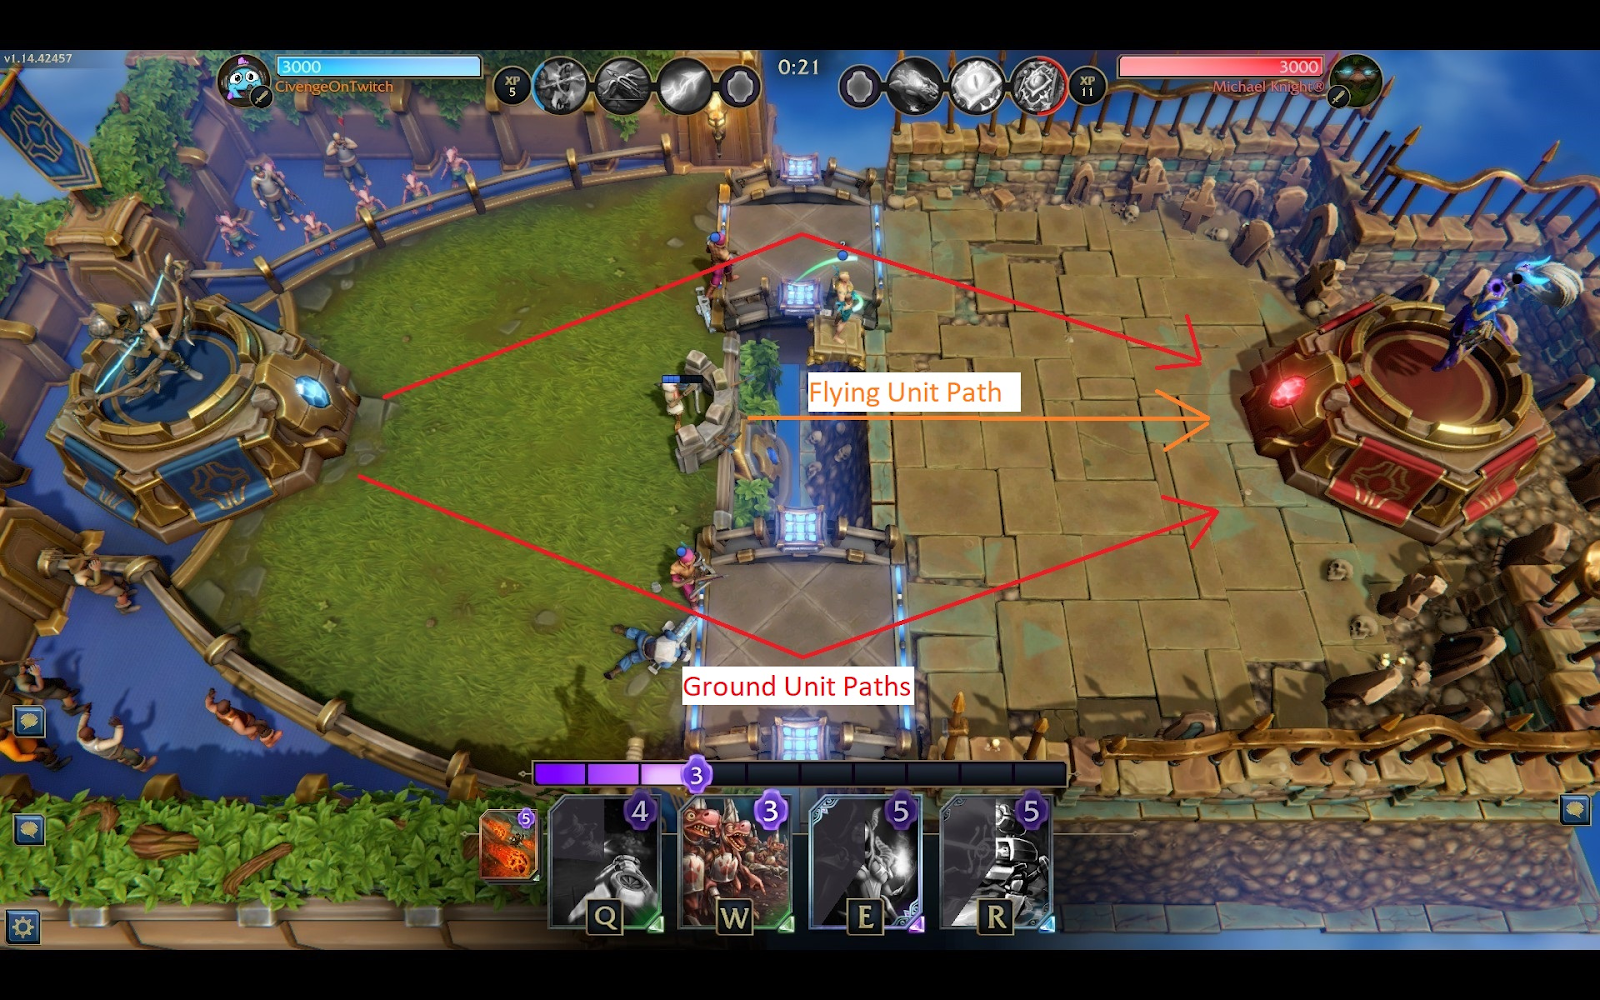
There are two lanes, or paths, that ground cards will utilize and they will move along these paths towards the enemy base, stopping to attack anything they can reach along the way. Flying cards will go straight from wherever they are played towards the enemy base, flying over the middle chasm and stopping to attack anything in range along the way. For the most part, only flying cards and ranged cards can attack other flying cards with few exceptions.
That is a very basic overview of an extremely well done, strategic and most importantly FUN game that is Minion Masters. Let’s jump into more of the game in the sections below.
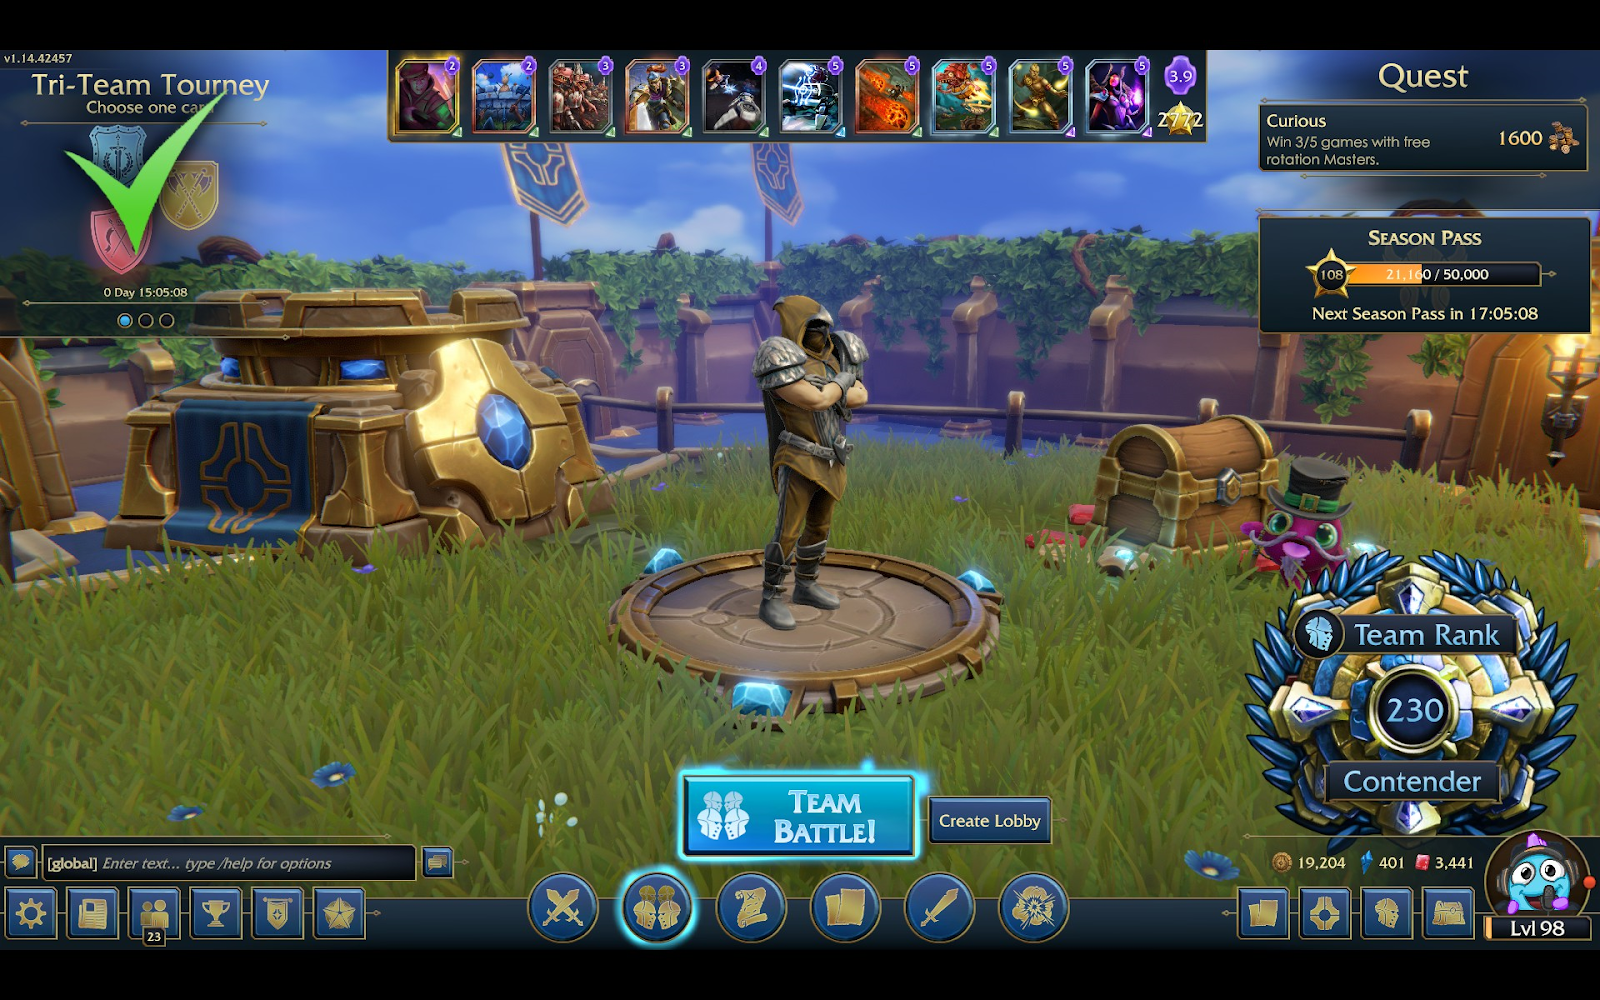
Game Formats: Solo, Random Duo, Pre-Made Duo
Solo: My least played format by far. It is a good format, and some of the best players play here. However, I enjoy the communication and cooperation that comes with playing with a partner. This is where rock, paper, scissors, lizard, spock is really apparent since you don’t have a partner to fill any gaps your deck may have, and you are less likely to win if your deck is a bad match against the opponent’s deck, regardless of individual skill levels.
Random Duo: I play here when I don’t have a partner. It’s fun, and since there are no planned synergies, it allows for more independence and for trying new things. It can be frustrating when your partner is struggling or plays inefficiently, but overall a fun format for me.
Pre-Made Duo: My favorite format. I have a partner R00t with whom I play with most of the time. This is where communication is key. We have both had our mishaps where a well intentioned Magma Storm gets played on top of a fresh high value friendly unit, or a double fireball/daggerfall is played when a single was sufficient. Overall, I highly suggest grabbing a consistent pre-made partner and playing this format if you can find one.
There are 3 other formats included in the game: Mayhem, Draft and Adventures. Mayhem is a rotating limited duration ruleset. Draft is similar to other games where you pick 1 of 3 cards until you fill your deck. Adventures are a single player mode where you complete a story. These are more like add on modes where the main play formats are mentioned above.
Screen Layout
So, you want to play the game? Good choice, but there is a lot more going than what it might seem. Here is a quick overview of 8 key pieces of information you want to watch throughout the match:
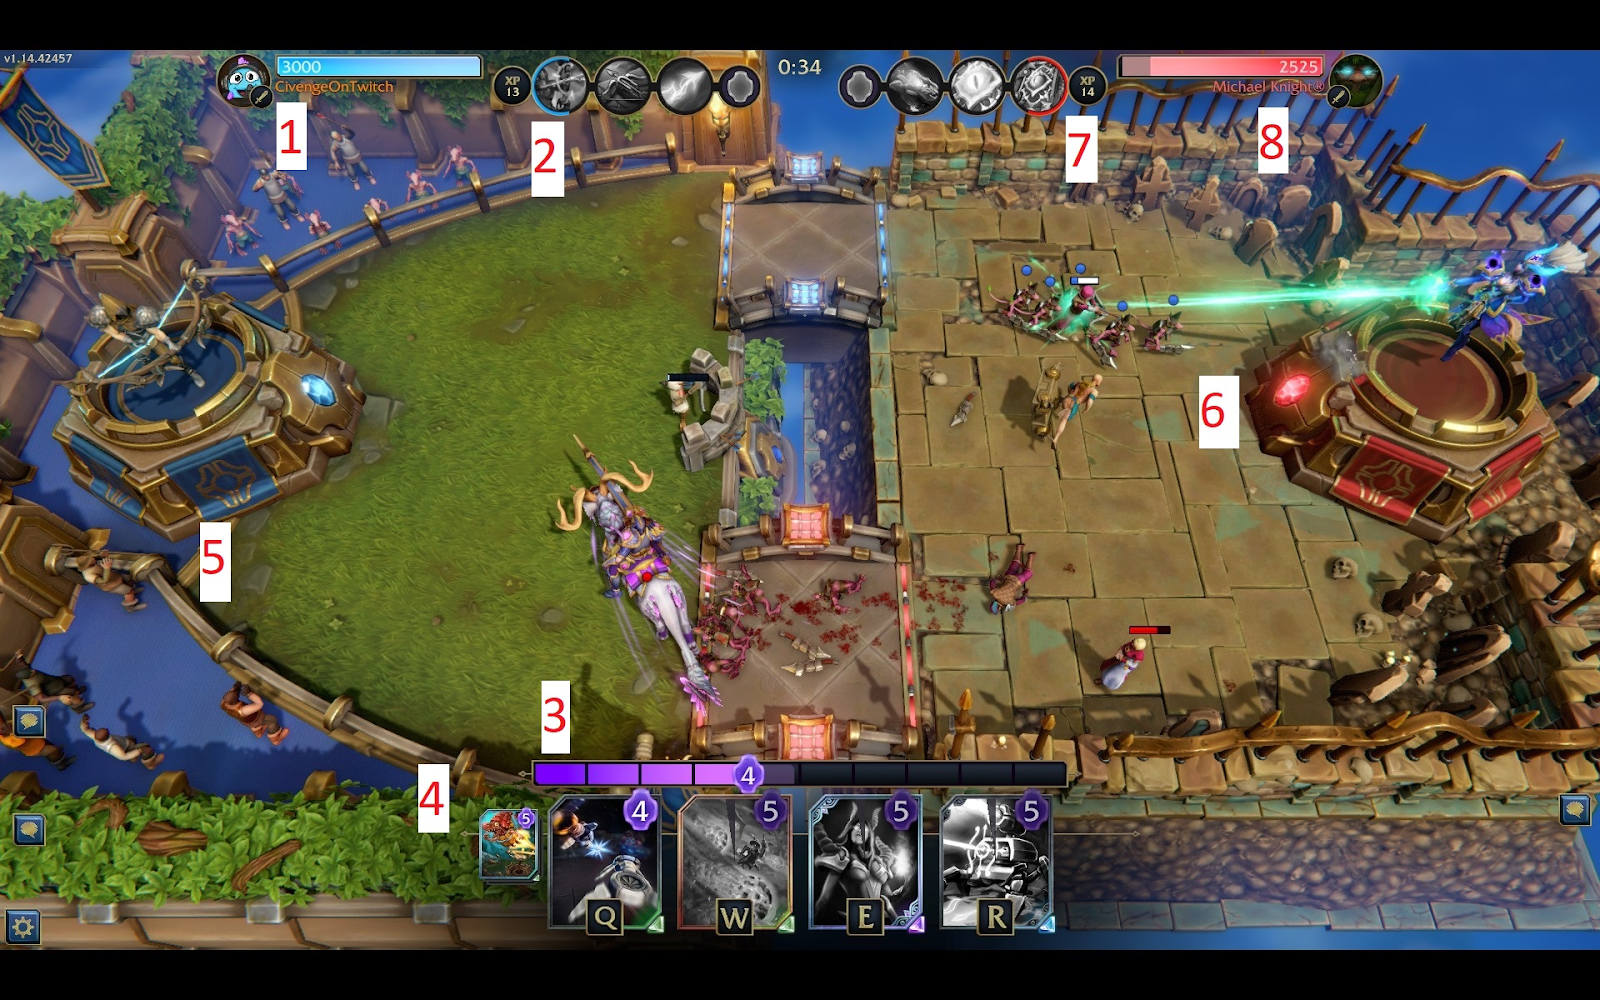
- Your Tower’s Health – If it reaches 0, you lose.
- Your Master’s Experience – Each circle represents a perk, and the 4th circle is Mana Frenzy, more on this later.
- Your current mana – As seen here, I have 4 mana and can currently play 1 of my cards bound to “Q”. The other 3 cost 5 and I must wait to play them.
- Your next card – This is the card that will come up next once I play any of my current cards. This is important because sometimes you need to cycle to this card to counter something you can’t currently deal with.
- Your Tower – Protect it.
- The Enemy Tower – This is where you will need to get units to if you want to win.
- The Enemy Experience – This shows what perks they have unlocked, and ultimately when they will get to Mana Frenzy.
- The Enemy’s Health – Drop this to 0, and you win.
There are of course other things to watch, such as:
- Current unit placements for both teams
- When the other team spends big mana on cards
- What units or spells you can use to counter
- When to Play units or spells ← **This is a big one for max mana efficiency!!**
Minion Masters Lingo
I will often refer to things by shorthand, or lingo. Here is a list of some of these shorthand that I use and what they mean:
- MM – Minion Masters the game
- Lane – The path of travel for ground units from your tower to to the enemy tower
- Face – Depending on the context, either the enemy tower or your own tower
- Base – One of the towers, yours or the enemies depending on the context
- Horde – A card that consists of many small units in one, such as scrat horde or skeleton horde
- Field – The entire arena where units can be placed.
- Pocket – The area above or below a master as far away from the other master, generally safe from minions traveling the lanes
- Push – When one side has a lot of units going to the other side.
- Split – Using a card containing 2 or more units, dividing them by the horizontal line which determines the lane in which units travel. Used at the start of the game or mid game to grab bridges efficiently.
Deck Building
Card Cost
The average card cost is probably the single most important mistake that newer players make in Minion Masters. Your whole experience will change depending on a variance of even 1 average mana cost. The difference between an average cost of say 3.5 mana versus 4.5 mana makes a huge difference. I highly recommend you try to stay under 4.5 average mana cost for your deck.
Balancing the Deck
It is important to build a balanced deck. Even more so if you want to play solo. An average balanced deck, not factoring in master perks, to me means (*indicates favorites):
- 1 or 2 spells – *daggerfall, *fireball, poison strike, beam of doom
- 2 or 3 ranged units to counter flying units – *A.I.M. Bot, *crossbow dudes, S.T.INT, sniper scrat, soul stealer
- 1 to 2 tanky units to protect your ranged units – *defenso chopper, *whirly scrat, *cursebearer, living statue
- 1 or 2 units that can clear hordes – *whirly scrat, *fire imp, annihilator, Fergus Flagon
- 1 or 2 high damage units – *fire imp, *A.I.M. Bot, succubus
- 1 or 2 cheap units – *scrat horde, propeller scratch, crossbow dudes
- 1 or 2 units to swap out and test of your choosing, or favorite units
You may realize that this could add up to over 10 cards. You may also notice that some cards fit well into multiple categories, and “double dip”. This is not an exhaustive list and depending on what your goals are, what master you choose and what cards you enjoy, you will find that you can deviate from this list and still be successful.
As mentioned elsewhere, pay important attention to your average mana cost for your deck. This is especially true if you have a high mana curve, meaning lots of expensive cards and the average cost is more than 4.5 mana.
Wildcards
Wildcards have been a hot topic and have changed over time. This is probably the most controversial topic you’ll find for Minion Masters. Some people think there should be separate queues for decks with wildcards, some love wildcards, some people don’t care either way. I think the current implementation of the wildcard system is fair and fun, whereby as long as you own multiple copies of a card, you can duplicate up to 2 cards and increase your deck count up to 12 cards. It can lead to some cheesy combos, especially in duos where you can essentially have up to 6 of the same card between the 2 decks. It doesn’t happen often, but it is possible.
Building Around a Card / Deck Synergies
So you want to build your own deck, do you? You have already played the game for a while, hopefully? Have you already looked at the leaderboards to see how others are building decks?
If you’ve answered yes to some or all of these questions, then prepare to take the next big step. Hopefully you have read the section above about balancing the deck, if not, do so now.
Now, it is important to figure out what you want to build around. Much like another of my favorite games, Path of Exile, you need to start with either a master, a mechanic such as mana surge, or a specific card. Then work backwards to get the most out of what you are building around.
Example Deck 1
For instance, one of my long time favorite decks I used is this:
Stormbringer: Crossbow Dudes, Grenadier, S.T.INT, Bazooka Scrat, Xiao Long, Cursebearer, Fire Imp, A.I.M. Bot, Living Statue, Ting, Teng & Tung
The goal I had when making this deck was to maximize the +2 range from perk 2, Aerodynamics. So I knew going in that I would need as many ranged units as possible to make this work. Remember, I play mostly in duos so I have not tested this in solos.
Let me go through the reasoning for these card choices:
- Crossbow Dudes – cheap bridge grab when you split, good versus scrat horde/propeller horde
- Grenadier – cheap horde clear, decent damage for the cost
- S.T.INT – cheap ranged unit to back up Living Statue, kill air units, bait out spells
- Bazooka Scrat – great for base damage when you have a strong push, takes out buildings like laser turret/wall/magma cannon
- Xiao Long – only flying unit that is immune to spells other than poison strike which isn’t in play much
- Cursebearer – decent tank, the curse is great against high health targets and lingers
- Fire Imp – incredible damage to hordes, single units and base
- A.I.M. Bot – immune to one shot spells like fireball due to shield, great range and damage
- Living Statue (or Jahun) – great meat shield, will contest bridge as long as it isn’t stunned, Jahun was my go to for a while and I swap back and forth on occasion
- Ting, Teng & Tung – fairly tanky for a ranged unit, great damage output initially, decent horde clear if living statue is ahead of it
This is just one example of my thinking as I go about making a deck.
Example Deck 2
Let’s look at one more example utilizing a different master:
Ratbo: Crossbow Dudes, Grenadier, Heal Puff, Propeller Scrats, “Armored” Scrats, Crystal Archers, Warrior, Xiao Long, Fireball, Demon Warrior
Ratbo is chosen because I want to cycle quickly to gain the demon warrior buff once I hit the 5th time played of triple health and triple damage. So Ratbo’s perk 1 and 3 of free scrats is free bridge grab and damage, and perk 2 is great at taking out large units if played at the correct time with all of the units on the field. Again, let’s look at the reasoning for these card choices:
- Crossbow Dudes – cheap bridge grab when you split, good versus scrat horde/propeller horde
- Grenadier – cheap horde clear, decent damage for the cost
- Heal Puff – this can be swapped for another unit, but gives some survivability and bridge grab which is important as this is a late game build
- Propeller Scrats – good versus light ground units, helps with perk 2
- “Armored” Scrats – good mini tanks, helps with perk 2
- Crystal Archers – anti air units, lane split, damage
- Warrior – cheap tank
- Xiao Long – only flying unit that is immune to spells other than poison strike which isn’t in play much
- Fireball – for clear or to finish off opponents, or protect demon warrior from hordes late game
- Demon Warrior – really really strong late game, but mediocre until then
The Masters
Stormbringer:
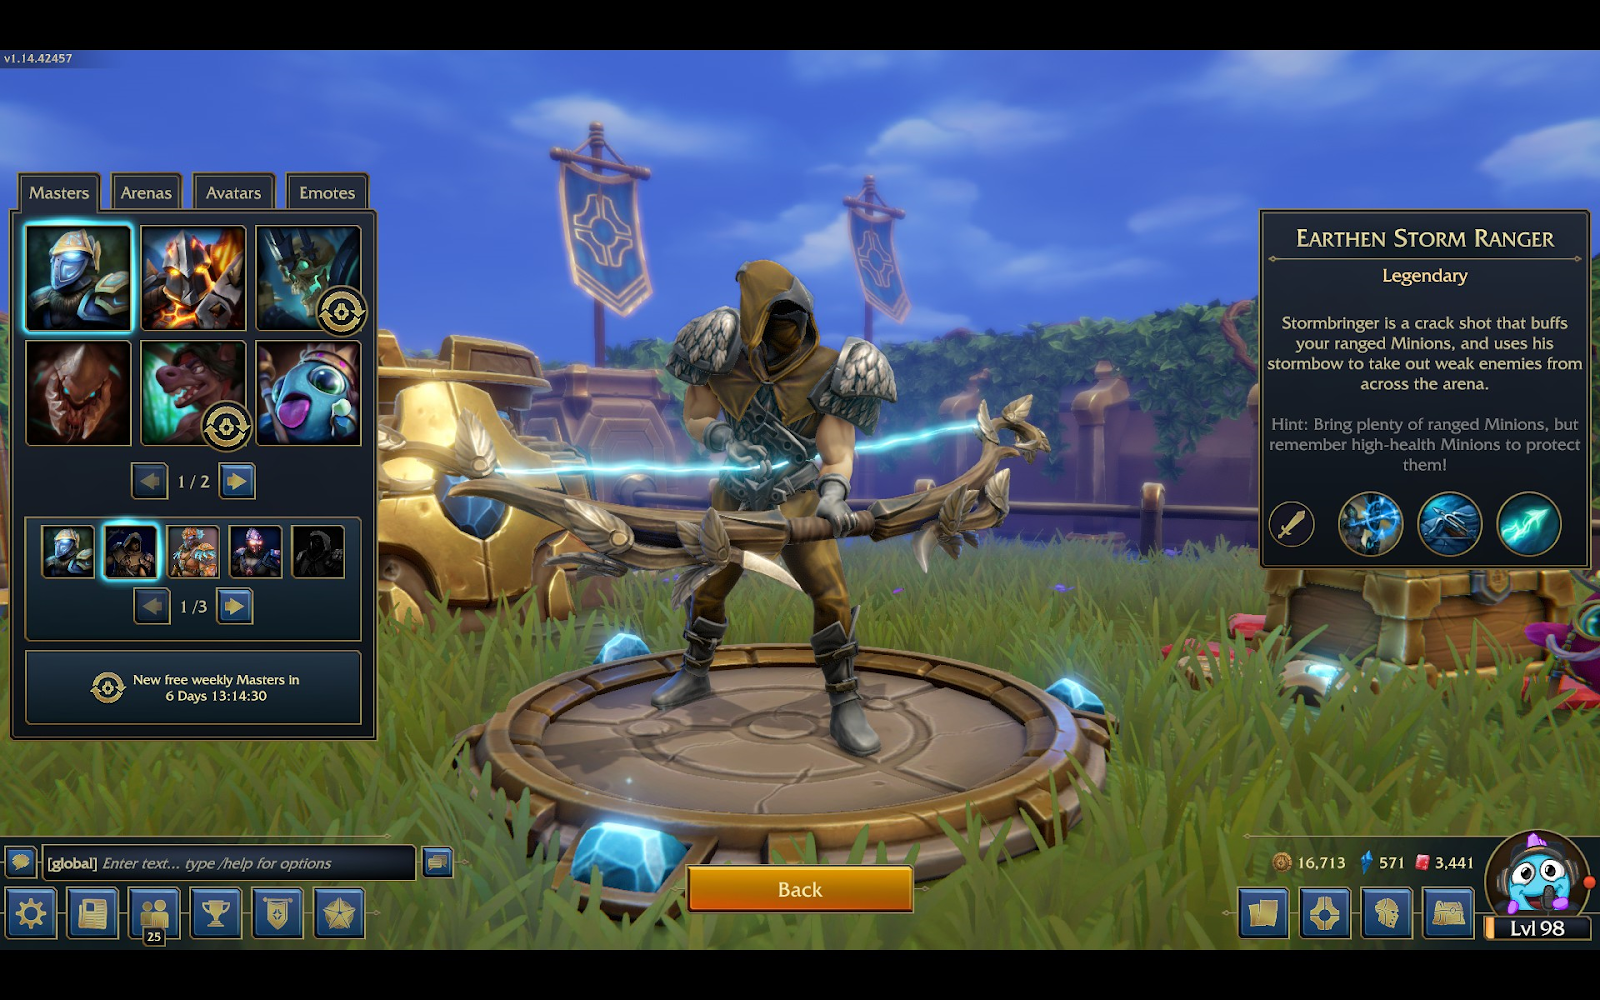
The default unlocked master. A passive master which doesn’t require any direct player interaction. Extremely good when paired with the correct units in duos. Initially Stormbringer will shoot the closest enemy unit on your side of the field.
Perks:
- Long Shot: Stormbringer will now be able to shoot the closest enemy unit on the field. A nice upgrade, but not enough damage to generally make a difference.
- Aerodynamics: All friendly ranged units for you and your partner will gain extra range. This is actually my favorite passive perk in the game. The extra range is extremely strong.
- Lightning Reflexes: Stormbringer shoots twice as fast. This is really, really annoying for your opponents as it actually does pretty good damage.
Pros:
Stormbringer is a really smart choice as the default master. He is easy to understand and use, and is fairly balanced overall. Having the extra range for all friendly units is a huge plus and can make the difference for units being able to shoot over the center chasm versus having to path all the way around a lane and across the nearest bridge.
Cons:
Fairly low damage early on until perk 3. Easier to counter early game than most other masters.
Volco:
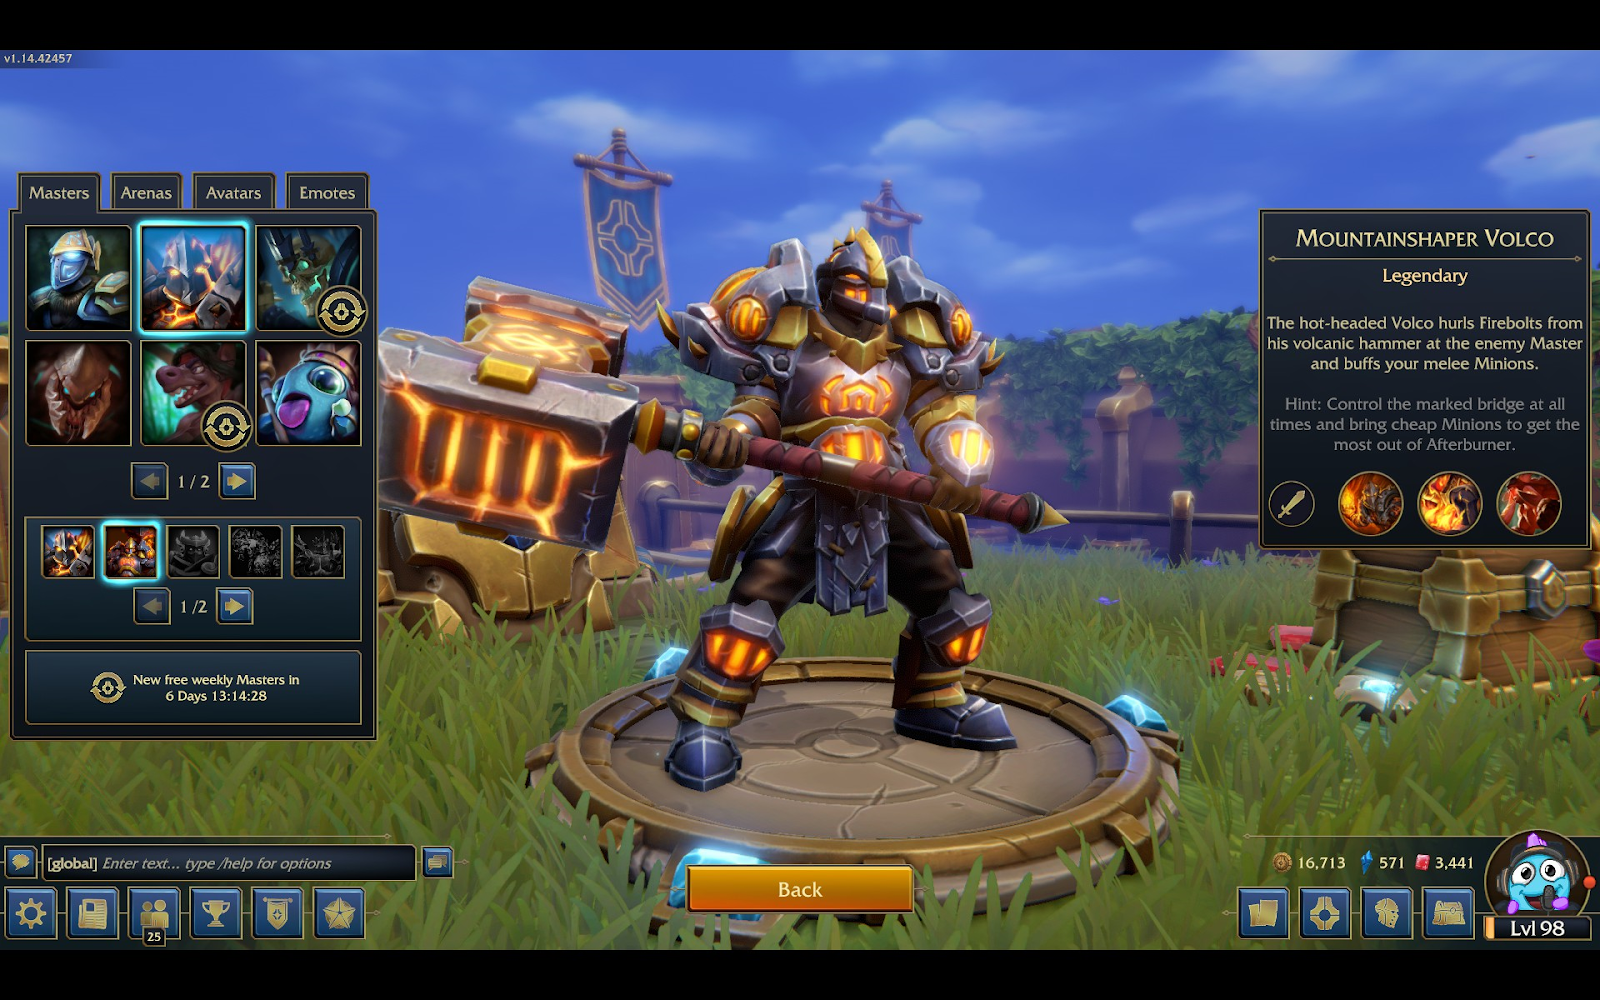
Volco is a high aggro master. He was reworked with a patch to now be less spammy. It completely changed the way he is played, while still having a focus on melee units. He is susceptible to ranged units as he can only attack ground units, but does a splash attack that is extremely effective against hordes. Make sure you have some cards that can protect against flying units in your deck.
Perks:
- Burn the Bridges: A great ability to play to clear hordes, valuable enemy units that are squishy, or just to supplement your units fighting on the bridge. It does 200 damage over 5 seconds to any enemy units on the bridges.
- Tempers Flaring: An extremely strong perk. This gives an ember of flame every 15 seconds on a bridge which allows a friendly melee minion to get free rage.
- Tempers Burning: Gives Berserker’s Rage, an updated version of Tempers Flaring. 100% increased attack damage but take 10% of damage to self. Strong damage but with a balanced drawback.
Pros:
I don’t play Volco often, however this is a strong Master. A well timed Burn the Bridges can destroy a strong enemy push. The bonus damage from free rage or berserker’s rage on perks 2 and 3 will really juice your melee units.
Cons:
Air units will wreck Volco, especially hordes that have rage on them. Make sure you keep an air counter in reserve in your hand at all times, or you will lose the match.
Mordar:
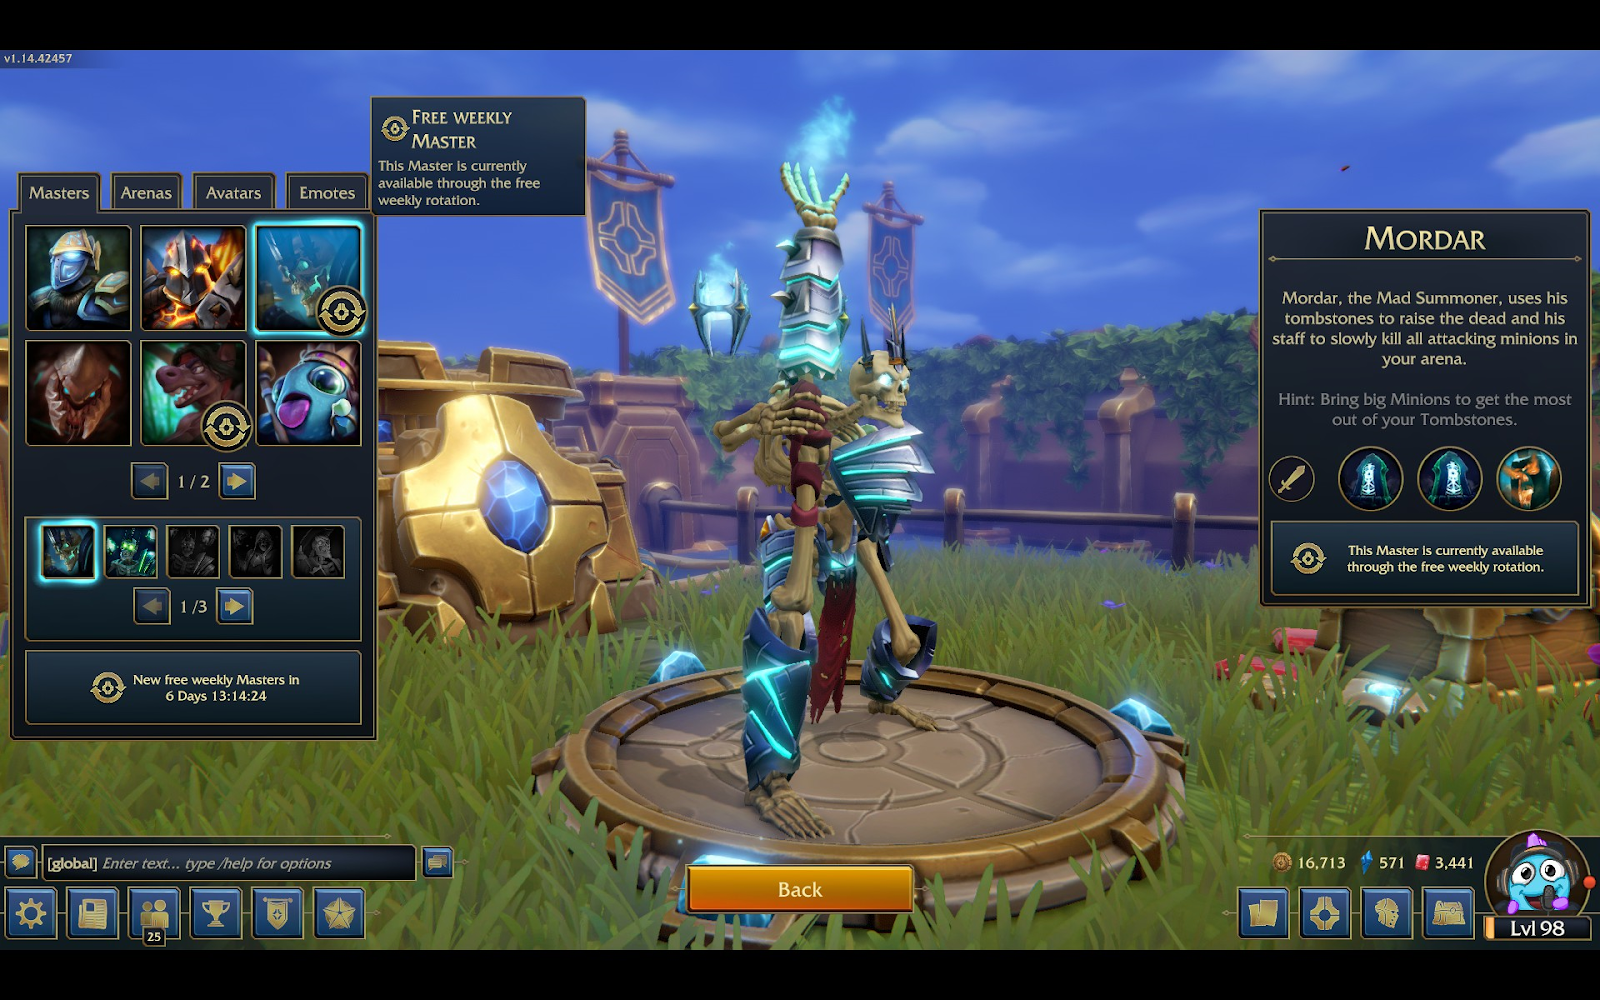
Mordar was changed for the better and is now a really fun master to play. His perk 1 and 3 only affect your own units, and a LOT of mana efficiency can be gained if you are able to maximize the tombstones with units that cost 6 or more. Before Ritual of Servitude was nerfed into the ground, Mordar was the choice master to run.
Perks:
- Tombstone: After an 8 second delay, the next friendly unit to die will revive at the tombstone.
- Another Tombstone: Gain another tombstone with the same effect.
- Vengeful Dead: Any revive unit will now have haste.
Pros:
Lots of mana efficiency with tombstones. If you have a tombstone ready, make sure your other cards are cleared out and play something big. Commander Azali, Colossus, Harbinger, Herald Ahmun, etc will all get a lot of value here. The perk 3 haste is really nice since generally you will be reviving a big unit, and big units are often slow otherwise.
Cons:
The biggest con is in trying to maximize the use of tombstones. This either means you have a higher than desirable average mana cost for your deck, or your tombstone is going to be countered with stun, other spells or the timing will be off to get the revive you want.
Ravager:
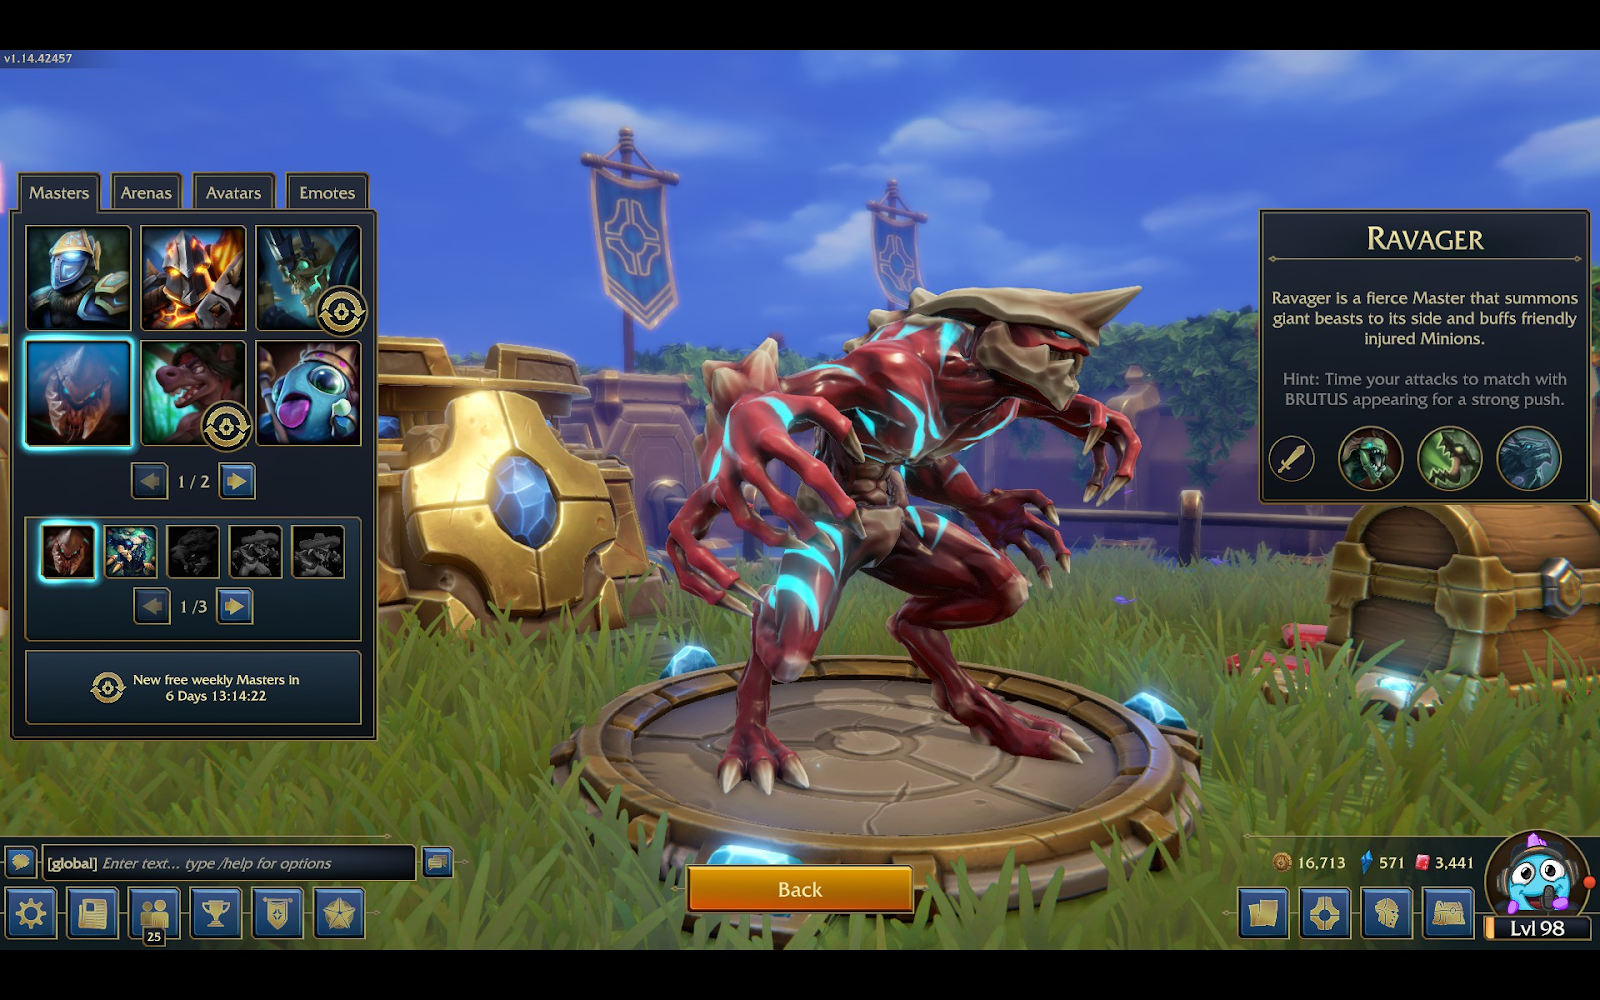
Ravager has one of the highest defenses versus units with low range, but cannon hit units with mid to long range attacks. Much like Volco, be sure to keep at least one card in hand that can deal with ranged units on face. Ravager eats hordes quickly, and even medium tanky units fall relatively quickly.
Perks:
- Best Buds: Summons a tank name Brutus to allow for a good push and some survivability.
- Feeding Frenzy: All friendly units gain frenzy when below half health. It is important to note here that the units will not lose frenzy if they are then healed above half health. This is a nice bonus that stacks with Volco’s rage on melee units.
- Terror Brutus: Summons an extra tanky unit with good survivability, but still not a lot of damage.
Pros:
With Ravager at perk 1 and 3 you have the opportunity for a big push behind the Brutus units. These are sizable tanks, with a minor amount of life steal to keep them alive.
Cons:
Since Ravager has a single unit for perk 1 and 3, it is easy to argue that you are basically getting a free ~5 mana unit at perk 1 and ~8 mana unit at perk 3. These are single time benefits and not long lasting like some of the perks other Masters have perks that benefit either multiple times or over a duration.
Ratbo:
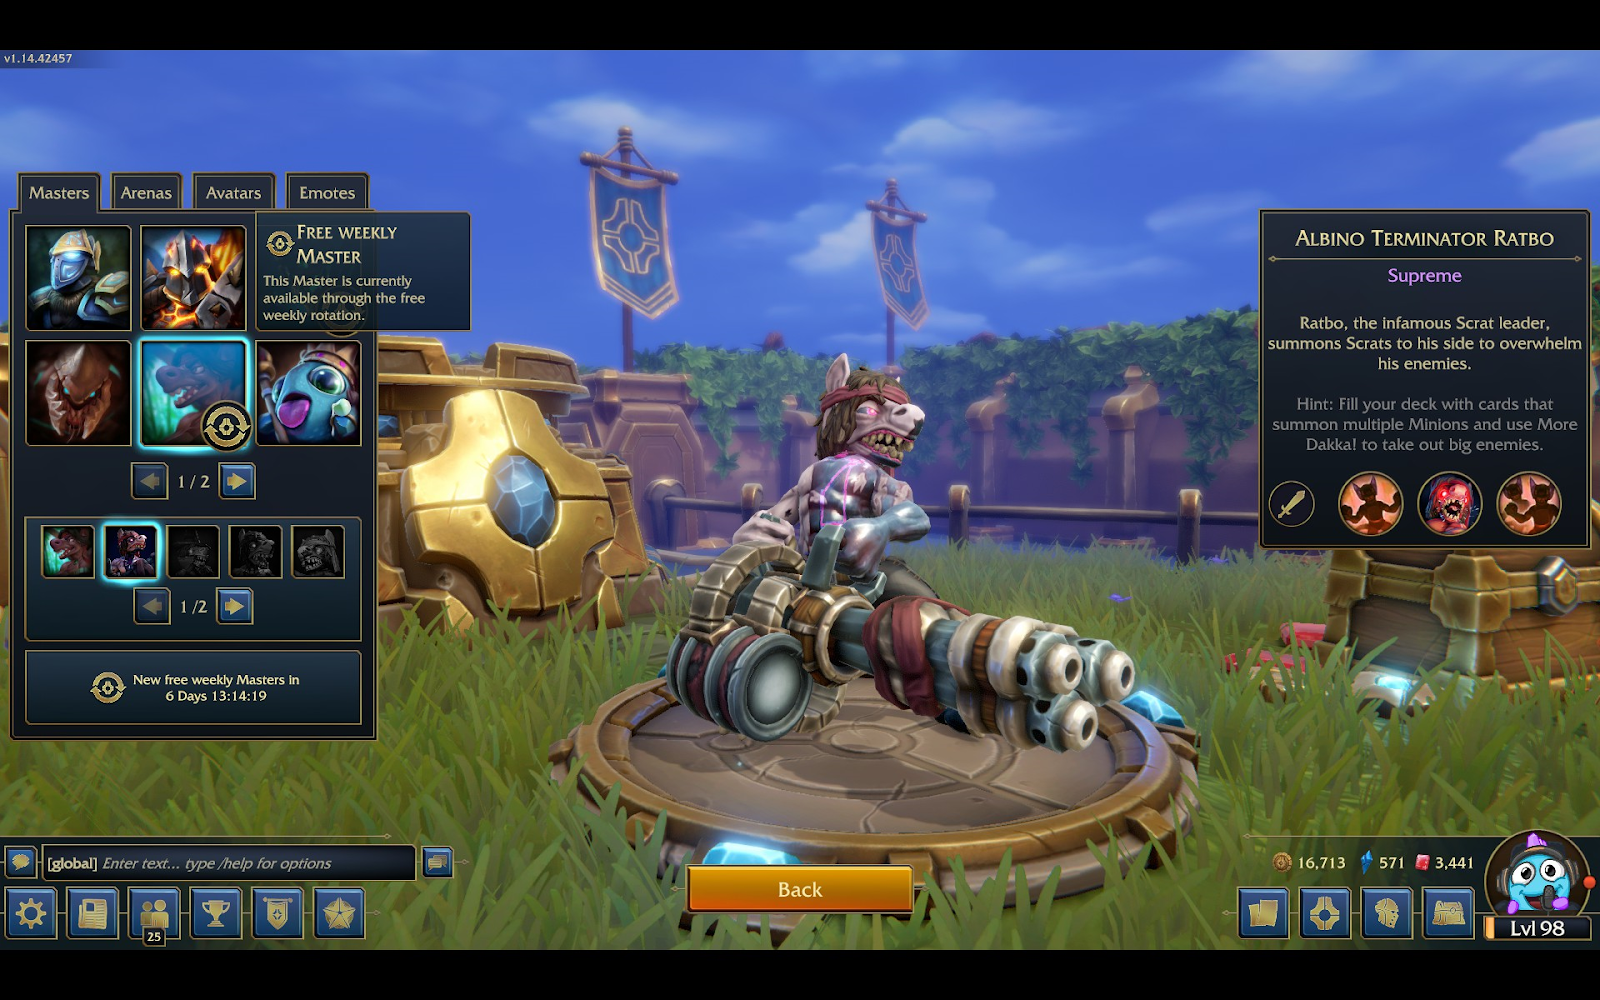
Ratbo has been considered one of the best and at one point the least played masters. He has a great ability to summon hordes of minions through use of cheap cards and perk 1 and 3. His perk 2 ability goes well and can kill even the strongest of minions when played properly.
Perks:
- Scrats: Summon a scrat whenever you play a card, or an armored scrat if the card costs 5 or more.
- More Dakka!: Unleash the fury of the chaingun, dealing damage to the nearest enemy unit to your tower for 40 damage per friendly minion on the field.
- Scrats! Scrats!: Summon 2 scratch every time a minion is played, or 2 armored scrats if your card costs 5 or more. This is an upgraded perk 1 which adds an additional scrat.
Pros:
Who doesn’t love waves of minions unleashing a bloodbath? See the cons section for that answer. Overall I enjoy playing Ratbo as he has good passive bridge control, his perk 2 is really fun to use, though the targeting can sometimes be weird. All provide benefit throughout the entire match, unlike Ravager or Morellia who have 1 time use perks.
Cons:
Soul stealer, that is all. No seriously, a soul stealer can ruin your Ratbo day. If the enemy is running one, which most people seem to these days. There are a number of counters to Ratbo actually: daggerfall, wreckinator, annihilator, whirly scrat, morgrul the swarmer king, to name a few all have efficient ways to knock out waves of minions quickly.
King Puff:
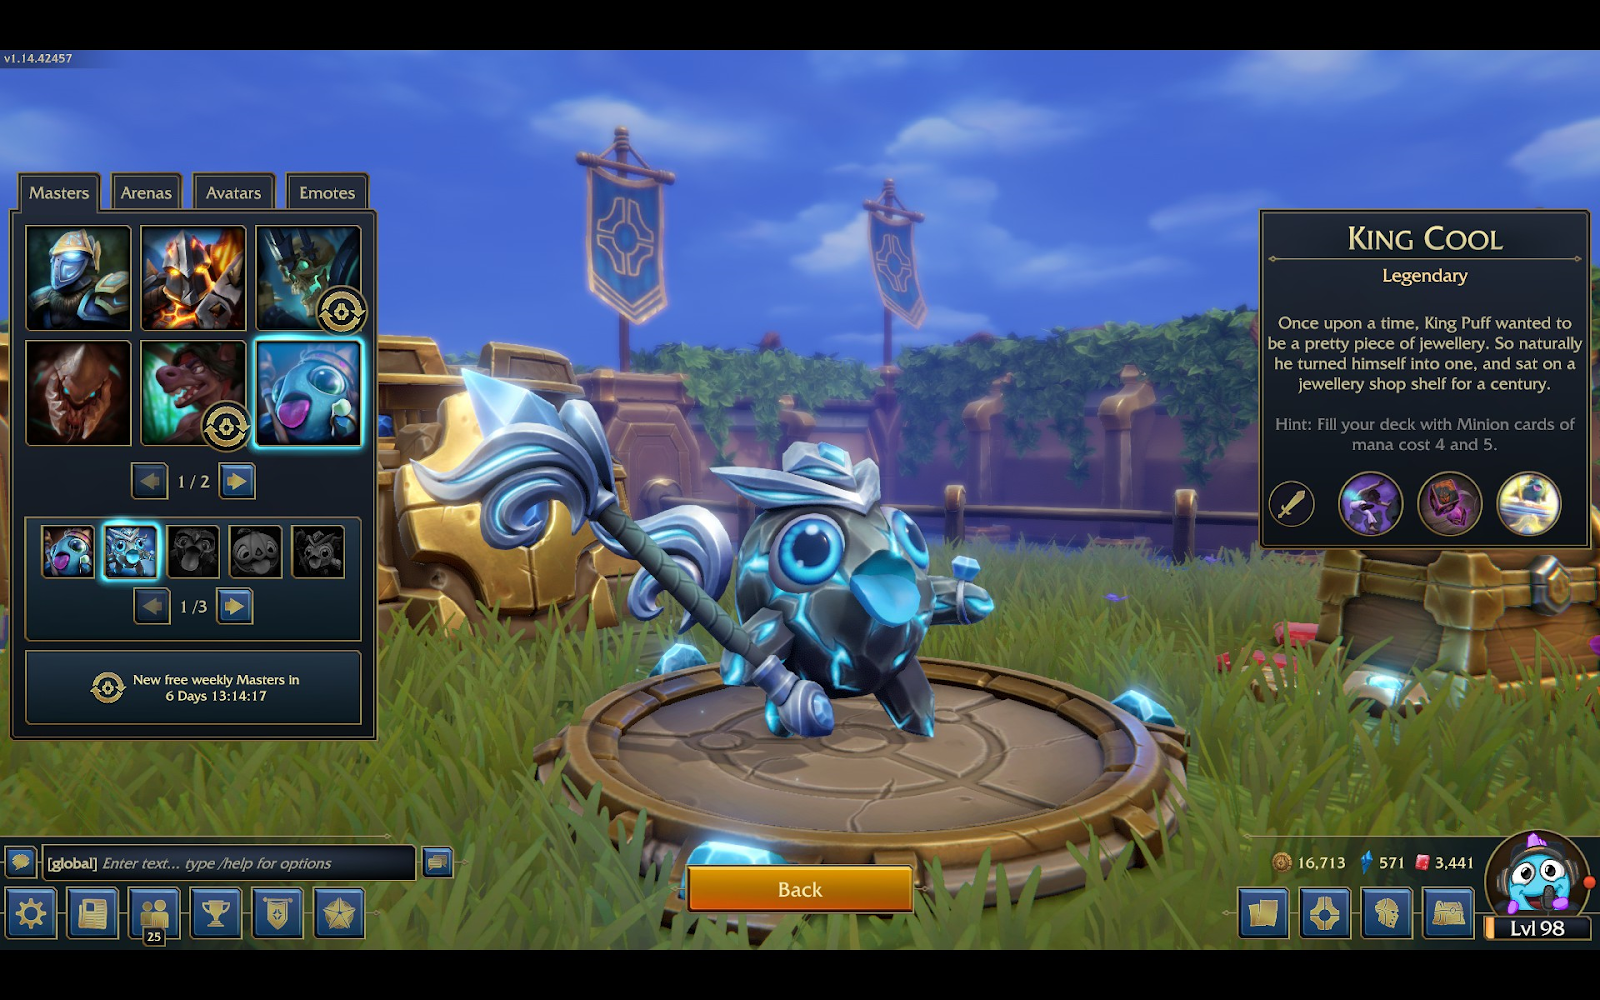
King Puff has fallen from grace in duos where I play. The most efficiency is gained from using 4 and 5 mana cost cards which greatly limits the selection while increasing the average deck cost to the high end of playability.
Perks:
- Trick Swap: A very impressive perk which swaps all minions on the bridges, and will stun enemy minions at the same time. This is useful for separating crystal cards from the guardian, or colossus/stormy from priestess.
- King Buff: One of the best perks in the game. Every minion that costs 4 or 5 mana will spawn with either shields or rage. This is why people play King Puff.
- Bridge Shield: An interesting perk, but often unreliable. If your team controls the marked bridge, your tower is invulnerable.
Pros:
King Puff has one of the strongest attacks in the game. It is slow as snot though so don’t expect it to do much against hordes. The perk 2 is arguably the strongest single perk in the game, giving much needed damage or defenses to units.
Cons:
While perk 2 is strong, perk 1 is tough to use well and perk 3 is too unreliable to maintain unless you are already winning, in which case it is not all that helpful.
Apep:

Apep sees a lot of play in the solo leaderboard. Not my area of expertise but having an on demand tower invulnerability is incredibly nice during periods of high damage. It also allows for a few seconds of breathing room and if you are quick protection from spells.
Perks:
- Gift of the Serpent God: Put a random minion or building into your deck that costs 2 or more, and reduce its cost by 2.
- Shield Totem: Gain temporary tower invulnerability so long as the totem lives. It can be cast anywhere on your side of the field.
- Greater Gift of the Serpent God: Put another random minion or building into your deck that costs 4 or more, and reduce its cost by 4.
Pros:
On demand invulnerability is one of the strongest perks in the game. This can change a guaranteed loss into a hard fought win.
Cons:
Apep’s perks 1 and 3 can be a blessing or a curse, depending on the card you get. A lot of times you can work on something cheap or free, but there are some cards that just aren’t worth playing even at a reduced rate.
Settsu:
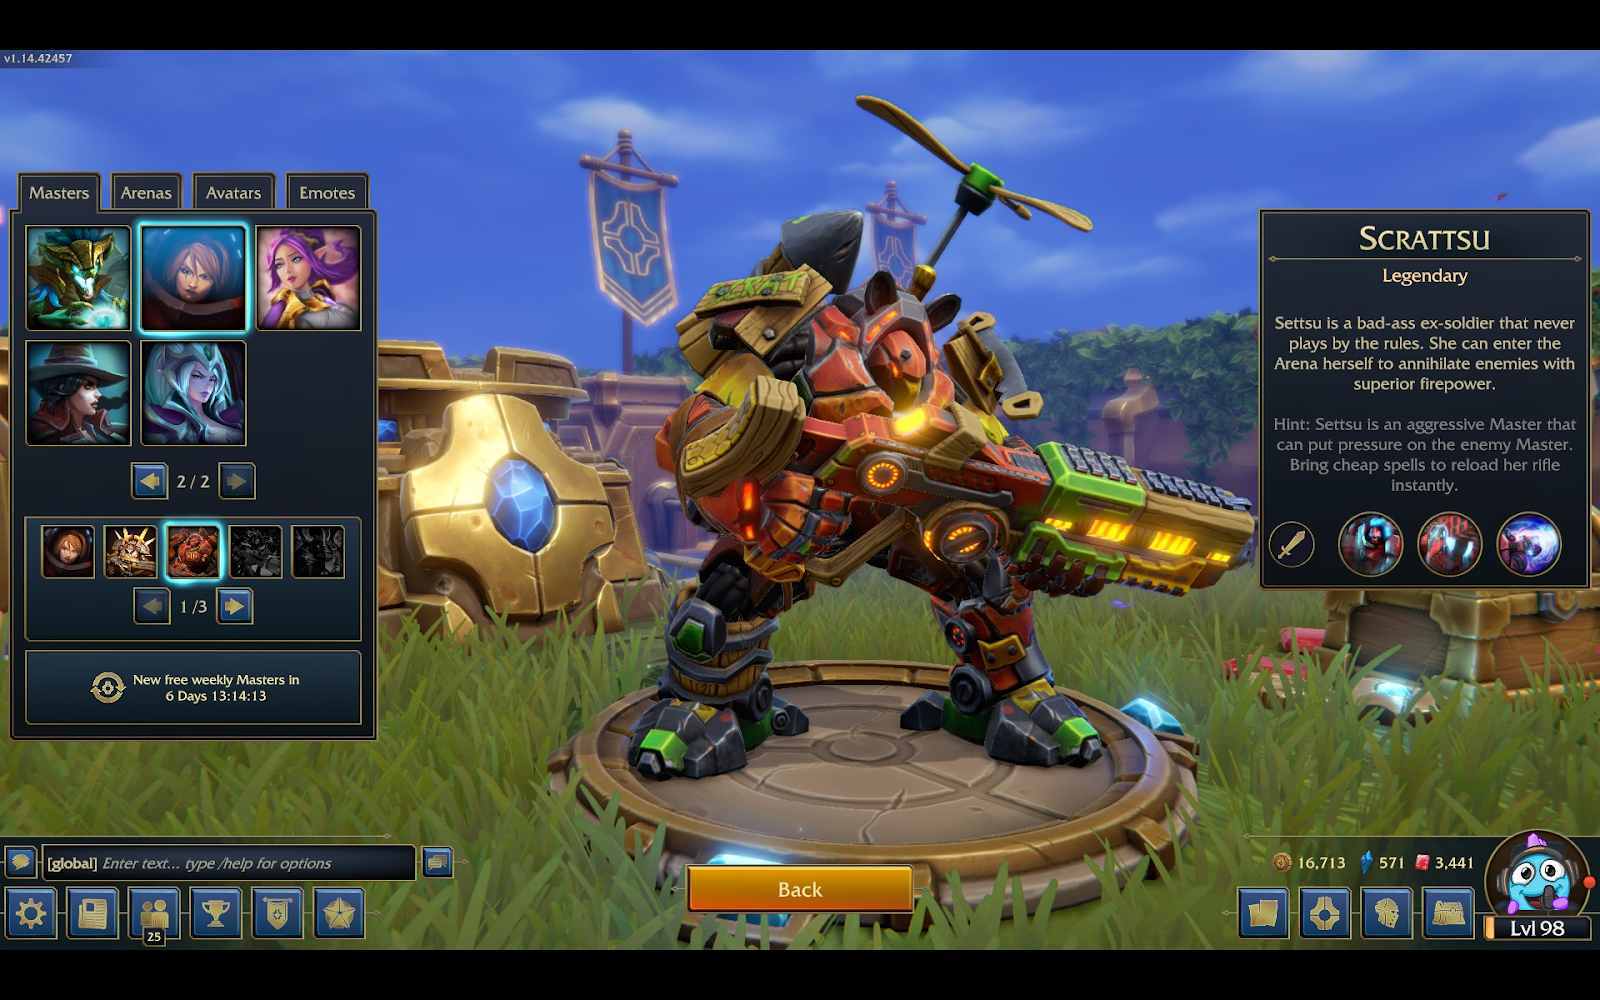
One of my favorite masters to play if I am not trying to build around a specific perk, alongside Morellia. Settsu has a powerful attack for base defense, but does have a hefty reload time.
Perks:
- Blast Entry: Settsu is able to “jump” to anywhere on the field, leaving the tower unguarded but dealing splash damage where she lands and proceeding to fire her 5 round magazine at the nearest enemy minion or tower.
- Combat Reload: When a spell is played, Settsu immediately reloads her weapon and can begin firing again.
- High Powered Laser: In addition to perk 2, whenever a spell is played Settsu also gains a stun beam which will hit in a narrow cylinder shape in front of her.
Pros:
Almost free damage to the enemy face as soon as you hit perk 1. Jump in, and usually you can get 200-300 damage to their face for cheap. Bonus points if you can hit and kill a ranged unit or horde. Settsu is also good to land on units like harbinger, soul stealer, styxi or other annoying units.
Cons:
The reload time when defending base can be bad, especially if there is only 1 shot left in the magazine when they arrive. Losing base defense on an enemy push is also bad, but generally you won’t want to jump away right as a push is hitting face.
Milloween:
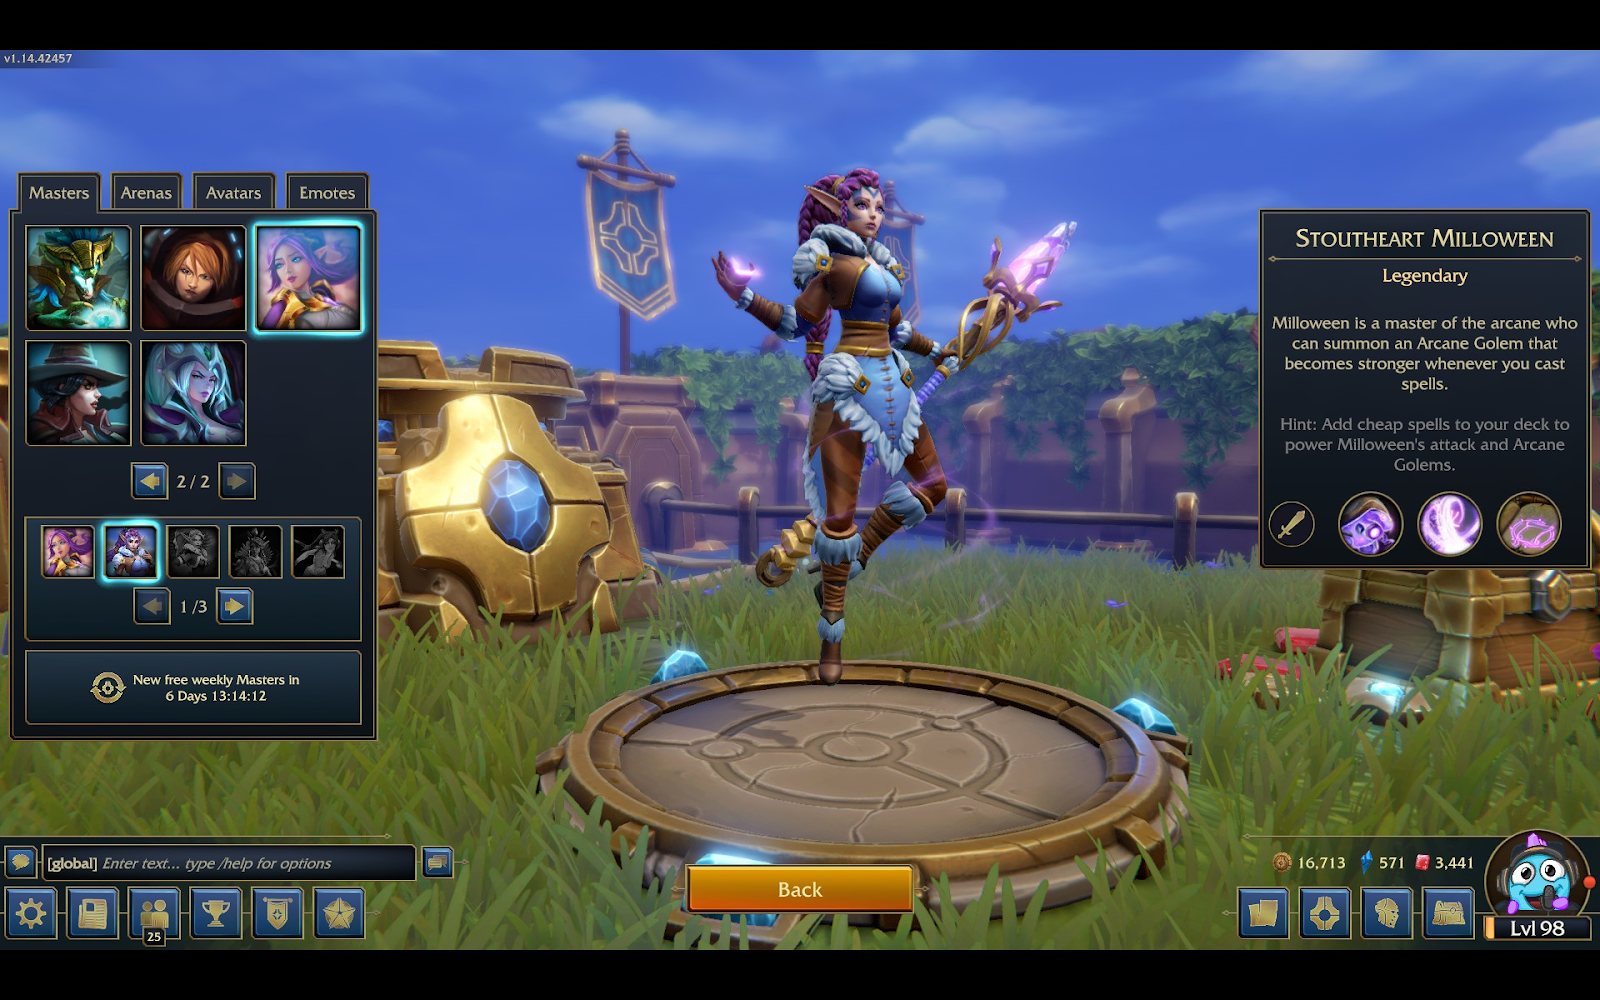
Milloween is the spell focused master. Her arcane golem aka “turtle” scales off of spell use, so generally you will see decks with at least 5 spells in them if Milloween is the master. This is the only master I recommend running more than 2 spells in the deck outside of shenanigans like Mayhem.
Perks:
- Arcane Golem: Aka “turtle” as mentioned above. This is a really strong unit if played correctly and scales with increased max health and damage for each spell played. You get a new one every 30 seconds.
- Arcane Missiles: A free spell which does a total of 150 damage in a line across the field. If aiming for flying units, predict where they will be and aim for the shadow beneath them!
- Xanian Construct: The turtle now starts with 5 stacks of bonus health and damage, and becomes a lot more deadly and hard to kill.
Pros:
Milloween is a fun master who can effectively utilize a spell heavy deck. Typically cheap spells like stuns and enrage combined with some sources of healing for the turtle will make for a deadly combination.
Cons:
Since spells are 1 time use, be careful to not to overspend mana on clearing minions. See the mana advantage section for more information. Milloween is not often seen at the higher ranks.
Diona:

Diona is a master that does not see much play at least in the duos formats. I attribute this to the hard to use effectively traps and the randomness of the perk 2 ability, often gaining no value.
Perks:
- Art of the Hunt: Gain either a taunting trap or a damage trap that cycles through your deck.
- Fetch!: Every 10 seconds, your pet dog will attempt to go get a prize from the death of an enemy unit which can be either mana, experience or health.
- Thrill of the Hunt: Gain a second trap card that cycles through your deck.
Pros:
The trap cards can be used as bridge grabs. The taunting trap can reset the target of an enemy unit or pull a unit off of face. Since the traps can be placed anywhere, this is true even to reset enemy units defending the enemy tower. The crossbow trap can provide supplemental damage.
Cons:
Diona is a tough master to play well. The perk 2 bonus is unreliable, as it can be anywhere on the field and the dog has almost no health. The trap cards outside of bridge grabs are difficult to gain much value from because they are low health buildings.
Morellia:
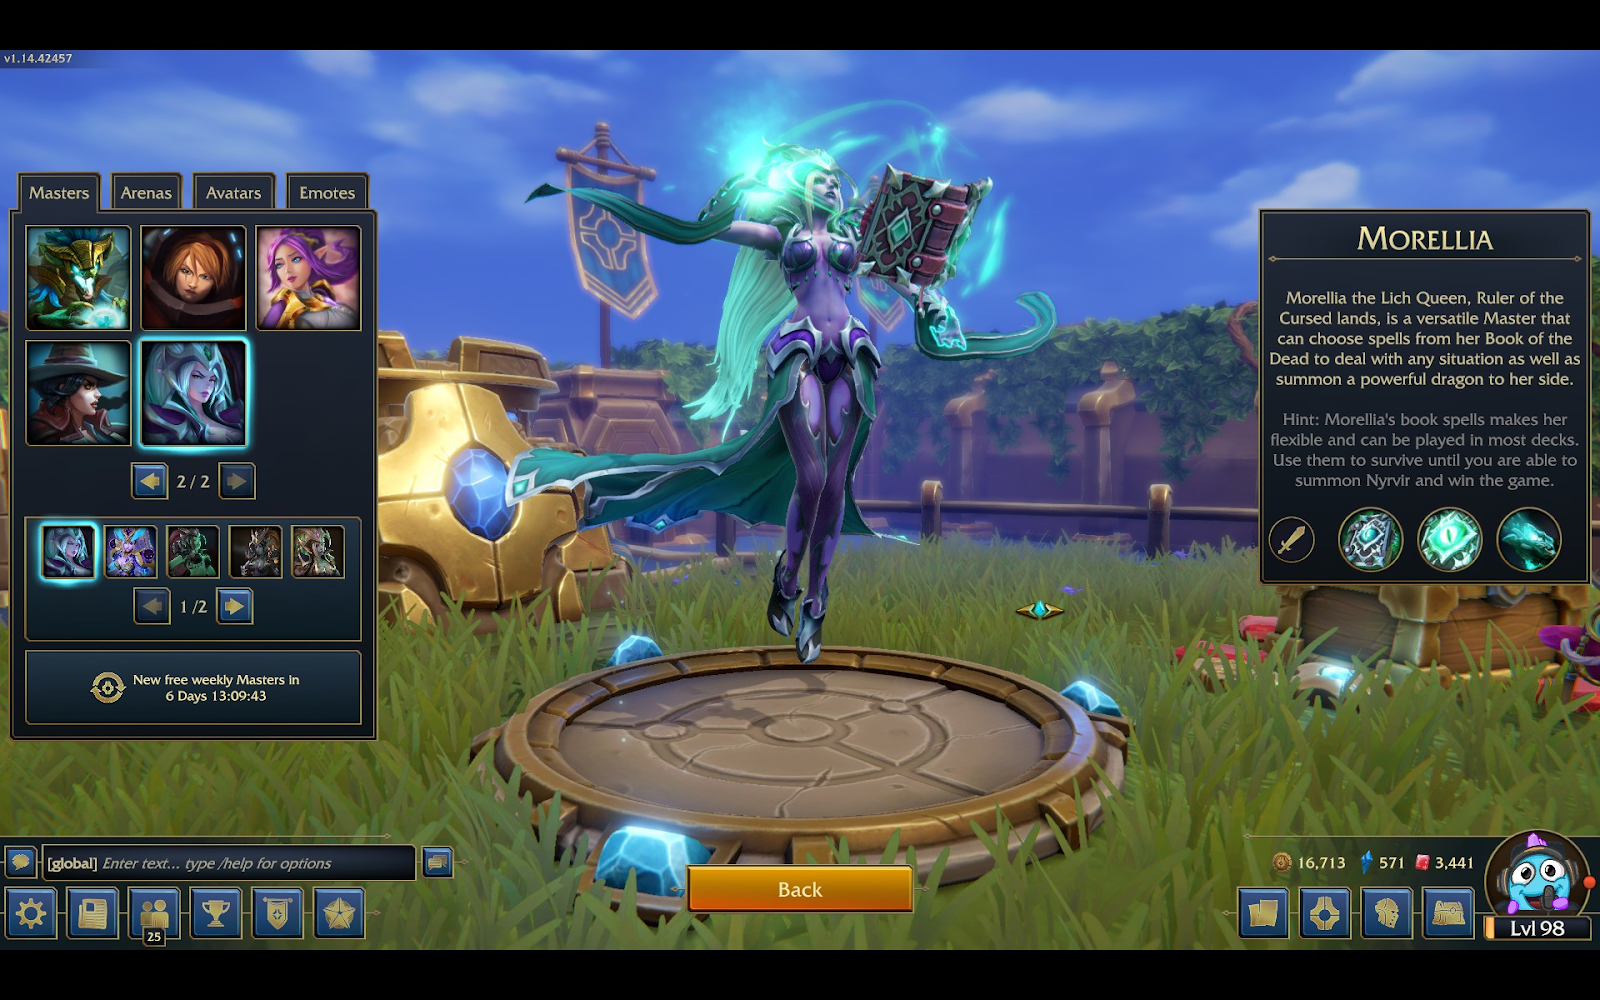
Morellia is a Master who has seen a lot of play time in various decks. There are few decks where Morellia can’t offer value much like Settsu.
Perks:
- Book of the Dead: Every 30 seconds gain a card which gives a choice of: 3 skeletons, grant spirit to a random friendly minion, 100 life drain from the nearest enemy minion, or reduce the cost of 2 spell cards which cost 4 or more mana by 1 mana.
- Unholy Bargain: Perk 2 is a stronger version of perk 1 with these options: 6 skeletons, random spirit to 2 minions, 100 life drained from 2 nearest enemy minions, or reduce the cost of 2 spell cards costing 4 or more mana by 2 mana.
- Queen’s Dragon: This is what people count on late game. This gives you a free Nyvir the Fallen dragon card which has the highest health in the game and good damage per second in an area.
Pros:
All 3 perks for Morellia are strong in their own right. Perks 1 and 2 offer a lot of versatility and perk 3 is often used for a game ending push. Morellia is a solid pick for most decks.
Cons:
The only downside is really in the usage of perks 1 and 2. If a unit dies before the life drain or spirit is completed, then you lose that effect and get nothing.
Card Placement/Strategy
When To Play a Card or Spell
Having situational awareness in this game is key. At any point in time you have to be aware of what 4 cards you have on deck, what your partner has in duos, how much mana you have available and what units are on the field. Also be aware of your next card coming in case you can cycle to it.
Who has the bridges and higher experience? If no units are on the field, and your team controls both bridges, save mana up towards 10. Do not throw away mana on a high value card when nothing is on the field. If you are hitting 10 mana, play something cheap.
It is much, much easier to counter units on your side of the bridges. Especially units such as Colossus, Jahun and Harbinger. Never engage those units on the enemies side of the field unless you have to because they will likely have a source of healing behind them and the mana you invested will be wasted. This will lead to a larger push to your side of the field and the enemy having a huge mana advantage over you.
Once you are a few minutes into the game, you will also have a good idea of what cards an opponent has. There is always a chance that a card could be held in hand, which can surprise you later in the match. A classic example is combustion, which is almost always saved to kill large units like Colossus.
- Do they have Magma Storm, fireball or Daggerfall? Be careful of big pushes of clumps of units.
- Stun Blast is an extremely valuable card when you have a large push going into the enemy base and they play an expensive counter like Fergus Flagon. Not only will it prevent the opposing masters from attacking, but it will shut down all units in a medium range for 5 seconds.
Card Targeting
Every unit will by default attack the closest other unit in range that it can hit, and will continue to hit that same target until one or the other unit dies. This is generally true, but not absolutely true. Stuns, card pushing, or a card getting otherwise out of range will cause the targeting to reset.
“Pushing” Cards
All unit placement “pushes” cards somewhat. In some cases, this can be used to your advantage. For instance, if there is a cleaver on your face, you can place a wall in between the cleaver and tower which will usually space the cleaver (or other unit) back just enough that it will retarget the wall instead. This can also be done with other large units, but it is less reliable to do so and get the target to change.
Mana Advantage
Generally the team that plays more mana efficiently will win the majority of matches. High aggro decks will sometimes counter efficiency, but generally this is true.
Let’s use a classic example: The enemy plays a scrat horde for a cost of 3 mana. Your team plays a soul stealer for 5 mana in the middle of the field. As the horde comes across the bridges, your soul stealer kills 5 units before the scrats are all dead. Now your soul stealer has full health and 5 stacks of soul steal for a 100% attack speed increase. Now the enemy team has a choice:
- Do they let soul stealer do a few hundred damage to face and counter from afar
- Play a tank with ranged support
- A spell (which the only one that completely kills soul stealer are magma storm or beam of doom)
- Play several ranged units which some will die further increasing soul stealers attack speed and damage per second
There is no great choice here. My preference would be to Magma Storm or play a tank with ranged backup but even then soul stealer is going to do a lot of damage to something. Either way the other team has lost a value of 3 mana for scrat horde, and 5 or more mana from a spell or tank + ranged unit all for a cost of 5 mana on your side. In effect, your soul stealer has gained you a net mana advantage of at least 3 mana as the scrat horde was countered easily.
Another example: The enemy plays Styxi, a legendary sniper scrat for 6 mana. This unit stealths, has decent damage and one of the highest attack ranges in the game. The best and easiest counter for this is to cast a fireball which will kill it outright. Bonus points if you can also hit other units or the enemy tower at the same time.
Mana Surge, Enrage, Haste, Accursed Ascension, Other Effects
Some cards have special effects, here are a few of the most common effects with an explanation of what they do.
Mana Surge:
Anytime you 6 or more mana saved up, these cards will gain a 50% attack speed bonus. Typically these are Crystal cards which are more fragile but have extra range or damage compared to other cards of similar cost. In most instances, it is best to play a tank
Rage:
This is a buff which gives a unit 50% increased attack damage. Most often this is useful for hordes of units such as Ravenous Swarmers, attacking a single large unit like Living Statue or the enemy tower.
Haste:
This is a buff which gives a unit 33% increased movement and attack speed. It is especially good for units that are otherwise slow, such as Colossus, Harbinger or a late game Demon Warrior. Haste can be undone by an application of slow from various sources.
Slow:
Slow is the antithesis of haste. Once applied to a unit, that unit will lose 20% attack and movement speed. On a hasted unit, they will counter each other out and the unit will be back to normal speed.
Accursed Ascension:
This is a stacking buff that provides cards with a secondary effect upon reaching 60 mana spent on cards with Accursed Ascension. This typically is around 4m30sec into the game if you are focused solely on rushing Accursed Ascension. A lot of games can end prior to the 4 minute mark so be careful as this is a slow deck style.
Spirit:
This is a buff that gives a friendly unit 200 bonus health if it is a ground unit, or 100 bonus health if it is a flying unit. For almost every unit it is a huge boon, providing more survivability especially against spells like daggerfall or fireball. Application of spirit is oftentimes random since it will go to any unit within the range randomly.
Mana Freeze:
This is an additional cost for using a card. Typically this is related to certain crystal cards and it will prevent your mana regeneration until the cost of the mana freeze has been paid. I personally prefer to avoid cards with Mana Freeze but a few of them are really powerful such as High-Mage Leiliel for countering ranged units.
Lycanthropy:
This will convert a unit into a werewolf upon getting under 50% health. Note that if the unit dies to a single big hit from a spell like fireball or a unit like Colossus and dies instantly, it will not convert to a werewolf.
Card Factions
I won’t go into too much detail here, but cards fall into specific factions. Each faction has a theme. BetaDwarf has added a few extra factions over time.
Scrat:
Generally these are low health units and fairly inexpensive. They pair well with the Master Ratbo, but it is a good idea to diversify and not try to run a scrat only deck.
Voidborne:
These are generally the “evil” faction. You’ll see a variety of types of cards here, but there isn’t a real incentive to running a “voidborne” deck outside of trying to use Crakgul Doomcleaver or Mal’Shar Shadowfork. I don’t recommend either of those units as it is too situational and easy to counter both units. Mal’Shar can be used in conjunction with Colossus and netherstep with some success, but again too situational.
Accursed:
These are undead themed and a slower deck style. Several of the cards here have secondary effects once you get to Accursed Ascension, but that is usually at least 4min30sec into the game which can be too little, too late. This is also where you’ll get your spirit bonuses which do not require the receiving cards to be Accursed. I do enjoy playing an Accursed deck as you get a huge Dragon late game, but it isn’t practical much beyond diamond rank.
Zen-chi:
My pre-made partner and I call this faction “Zen Cheese” as it revolves around lots of stuns and healing. It can be annoying to play against, and I don’t personally enjoy it from either side playing it or playing against it. There are some synergies around additional stuns from playing these cards in succession that are quite strong.
Empyrean:
If Voidborne is the “evil” faction, this could be viewed as the “good” faction. Empyrean cards generally are more defensively oriented through use of buildings, spells, big tanky units and some healing via Smite and Priestess.
Slither:
Slither units revolve around sacrificing units, killing units to buff up, and/or big damage. These are generally high agro cards without a lot of defensive potential. I don’t personally use the sacrifice mechanic, but it can be really nice situationally.
Puff:
I’m not really sure if you can consider this a true faction due to the limited number of cards and almost no offensive cards, but they are kinda cute. King Puff as a Master has no real synergy here other than his perk 3 invulnerability and the puffs are good as a quick bridge grab. The secondary effects of the puffs, especially healing puff, can really save a game that is going south if played at the correct time.
Stoutheart:
Another smaller faction, Stoutheart was added more recently and centers around a newer mechanic Revelry which allows for a bonus effect when two stoutheart units are placed near one another. I mostly avoid using these cards as they are cheesy comps which while strong, don’t leave a lot of flexibility.
Losing
First of all, recognize it is going to happen. Minion Masters has a rock, paper, scissors, lizard, spock gameplay and you are going to run into someone with the perfect counter to your deck. Or maybe they were more efficient with their mana, or had better bridge control. Regardless, you are going to be seeing this screen:
But, the important thing to do is ask yourself a few questions:
- Am I losing more than I’m winning?
- Look at the match replays list and count your wins and losses, are you winning more than 50% of the time. If so, don’t fret you are still climbing ranks.
- Is the deck balanced?
- See the previous section around ensuring a balanced deck. Don’t try to force something if it isn’t working. Give it 3 – 5 games, and make changes.
- If playing in pre-made duos, do you have good communication? Use Discord or some voice chat, if you don’t have a discord, use mine (https://discord.com/invite/6uVw3mk). I have extra channels and can make more.
Thank you for reading my Minion Masters Game Guide. Hopefully now you are ready to climb those ladders. See you in the game!
Civenge’s Media:
Check me out on Twitch, Discord, Youtube and Twitter. Drop by and say hello:
https://discord.com/invite/6uVw3mk
https://www.youtube.com/channel/UCTbSvE8VE1-NP1A3nD-EtZg?view_as=subscriber
Credits
Thank you to BetaDwarf Entertainment for making one of my favorite games, Minion Masters! Thank you to those who watch and follow my stream (https://www.twitch.tv/civenge), and to the rest of the Minion Masters community on Twitch. There are a lot of really cool people that I have met through streaming this game, and without them I would not have had the desire to write up this game guide. And lastly, thank you for those who have taken the time to read this guide.