By Civenge
Introduction
Welcome to Legends of Idleon! If you are reading this game guide, then you have found a wonderfully built free to play game created by LavaFlame2. Legends of Idleon is free to play and can be found here on steam: Download Legends of Idleon. As of the first version of this guide, I have over 300 hours into the game, some of which can be seen over at https://www.twitch.tv/civenge as a little shameless self promotion. With that done, let’s talk about Legends of Idleon.
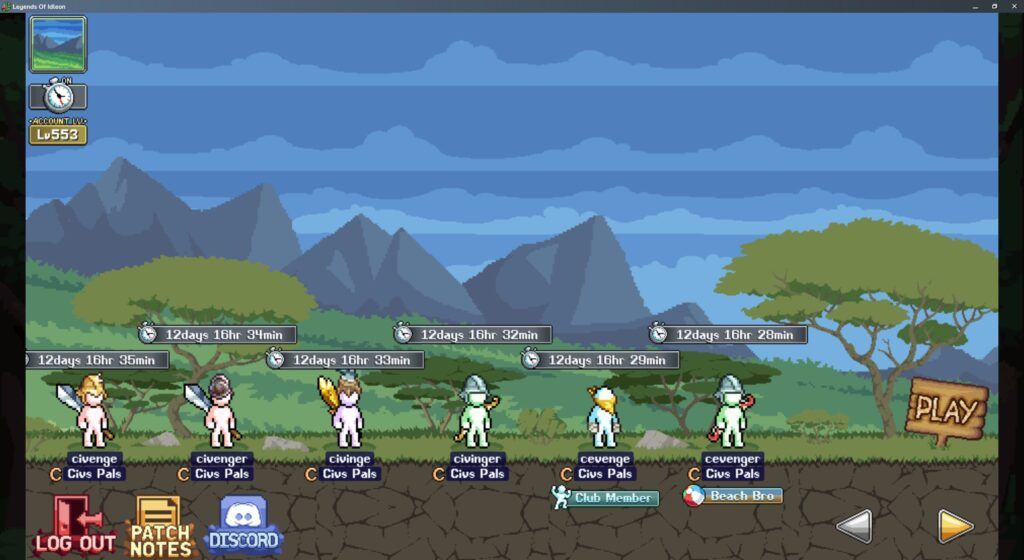
In Legends of Idleon you play solo. That is an important aspect to know early on, you are only going at the pace that you see fit, up until the future planned group activities are added. The purpose of this guide is to get new players off the ground and on track, ultimately to the start of World 3. I will explain the various skills in each world, and a high level overview of the main features: Classes, Worlds, Quests, Talents, Cards, Stamps & Bribes, Statues, Obols and the Post Office. This isn’t an exhaustive list, but it covers the main things a new player should know to proceed through the early to mid-game.
The other thing I want to point out is I will be covering things at a fairly high level. More detail can generally be found on the wiki at: Legends of Idleon Wiki and is a great resource, use it!
Starting Out
Upon starting a new game, past the character creation, you will automatically be assigned the ‘Beginner’ class. This is how every character starts, regardless of it is your first or your 8th. You’ll start your journey in World 1 – Blunder Hills, which I will cover more later. There isn’t much you can do at level 1 but one of the most important things is to open your Smithing and begin producing thread in 3 easy clicks. Just do it, you’ll thank me later:
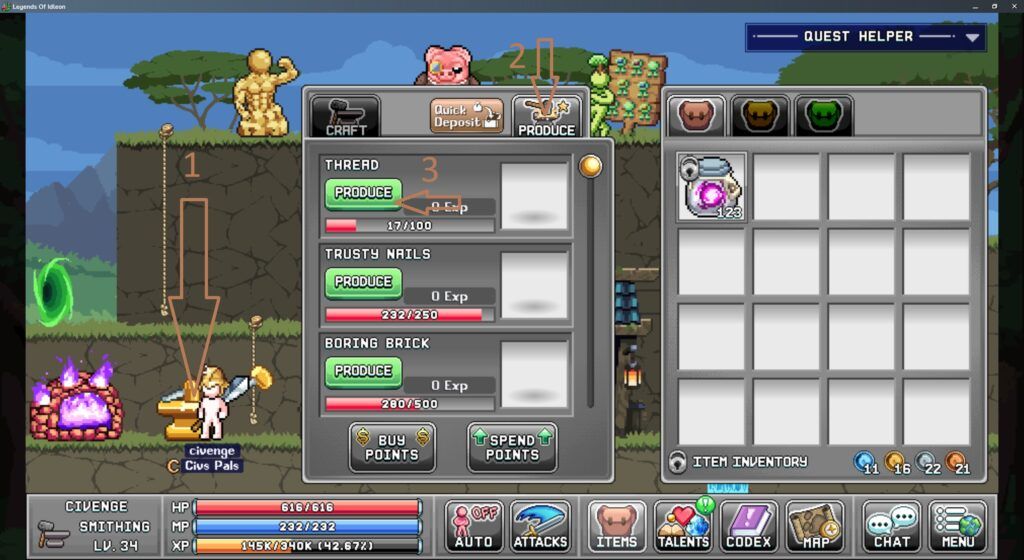
Don’t worry if your Smith or Forge look different than mine. There are ways to upgrade them for additional benefits using either real world currency or gems earned during Holiday Events. Once you hit the ‘Produce’ button, you are officially making Thread, congrats! Thread, and all subsequent materials produced by the Smith are used for crafting later on.
Now take a look at the various NPC’s in town. Some are not available to talk to right away, but will open up by the time you complete World 1. Talk to each NPC as they become available, and they will have helpful tips and sometimes quests to complete. As for quests, the quest window is not very intuitive at first but you’ll slowly get the hang of it.
The last thing to do before venturing out is to click ‘Menu’ and set you ‘Options’. The important thing to note here is to turn on all option sliders. This will enable some nice quality of life things.
With that complete, it is time to head out for your first zone by clicking the ‘Green Portal’ on the bottom right of the screen. This next zone is where you first get to kill creatures, FUN! The controls are simply, you either manually click on a creature, or you can turn on auto-attack. For most of your play time, outside of bosses, I recommend using the auto attack feature shown below:
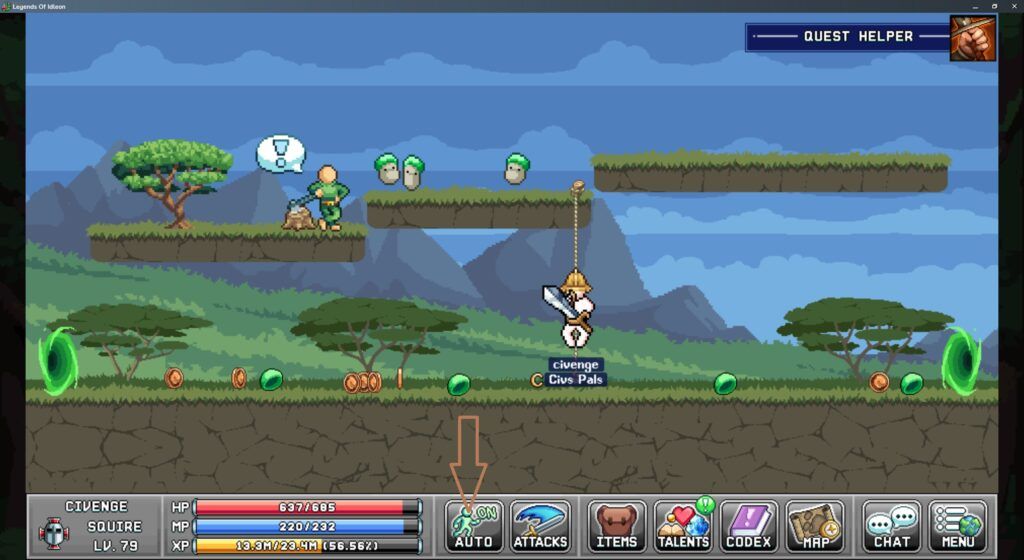
As seen in the screenshot above, I have already killed some of the slimes and there is a quest available to me. Looting is as easy as clicking on the items on the ground, or click once and drag over everything. The one item to watch is your ‘Items’ tab can fill up pretty quickly. Each slot has a fixed number of items that can be held, which is upgradeable later, as are the total number of slots you have. Your ‘Stash’ in town has nearly unlimited carrying capacity for an individual item, but limited by how many slots are available. This is also upgradeable.
Talk to the quest giver and he will introduce you to chopping, which is one of the main skilling you can do. So at this point focus on gaining some levels, kill enough monsters to unlock the portal to the next zone as represented by the number over the portal. Once you have 5 or more levels under your belt, you can switch to chopping.
Talents
At this point I think it is important to note that with each level up you will gain 3 talent points for your class, and each level of a skill will grant 1 talent point. Talents aren’t going to make much since at first, since you are still a ‘Beginner’ class. Generally it is a good idea to hold off spending these unless you know for sure what character class you will be picking. The talents can be respecced later, but it is a hassle to get the talent reset potion needed to do so. There are also $$$ ways to respec, but it is entirely not needed if you are smart about how you build your character, especially since each character gets 2 builds now as ‘Presets’. One for killing and one for skilling.
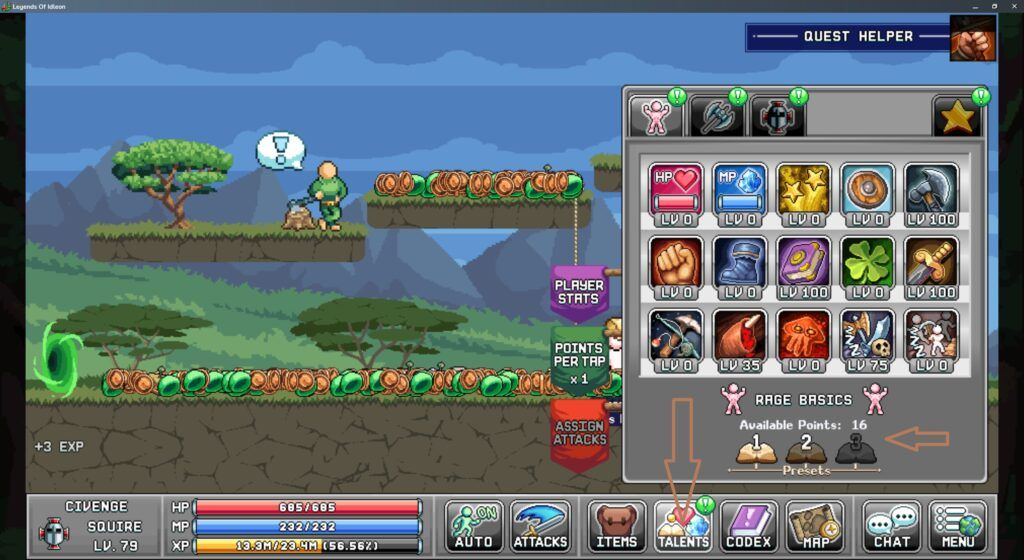
I’m showing the ‘Talents’ tab above, and the ‘Presets’ location to swap between them, which can only be done in town. This character is a level 79 Squire, and has 3 Talent Point tabs and the Star Talent tab. You will also notice he has 16 unspent talent points. The important thing to note here is different builds serve different play styles. There are ‘Active’ or ‘AFK’ killing builds, and ‘Skilling’ builds. A good place to start for whatever class you are is the wiki builds page: Wiki Builds Page.
Classes
As far as classes and sub-classes go, around level 10 you will have the option to pick your first of 3 classes: Warrior, Archer or Mage. Regardless of what you pick, you want one of each for your first 3 character unlocks. Each class has 2 sub-classes which further specialize. Here is a general table showing them:
| Class | Skilling Specialty | Sub-class 1 (& specialty) | Sub-class 2 (& specialty) |
| Warrior | Mining | Barbarian (Fishing) | Squire (Construction) |
| Archer | Smithing | Bowman (Catching) | Hunter (Catching) |
| Mage | Choppin’ | Shaman (Alchemy) | Wizard (Worship) |
That is a lot to take in. Each specialty class shares the early talent point and star talents, but then varies for the other tabs. Generally depending on your immediate goals, you will want to focus on levels first, then skilling once you have hit a natural progression wall. Skilling will open up better gear and more talent points; remember I said earlier that each level up in a skill gives 1 additional talent point.
Worlds
I don’t want to spoil any progression, so I will keep information to a minimum about each world. Each world has a series of zones with a progressively harder enemy type as you go. The key to unlocking the next zone is generally ‘Kill x number of creatures’ but sometimes might be a quest. Near the end of each world will be a boss area generally locked behind a quest. Each character can do the quest as they make it to the boss area. Characters do not have to all kill the bosses to make it to the next world, only one character does to get an item to unlock the portal to world 2, world 3, etc.
Quests
As I mentioned early in the guide, the quest system, and quest helper for that matter, are not very intuitive. This is mostly offset by the ‘Codex’ tab. There is so much going on in the ‘Codex’ tab, that I’m just going to encourage you to click around. It does include the ‘Quests’ list, in addition to many other useful pieces of information. For example, if you click the ‘Quik Ref’ tab, followed by the ‘Anvil’ and then ‘Produce’, you can collect any outstanding smithing resources without having to go back to town. Each character is making separate smithing resources, so this can be a huge time saver!
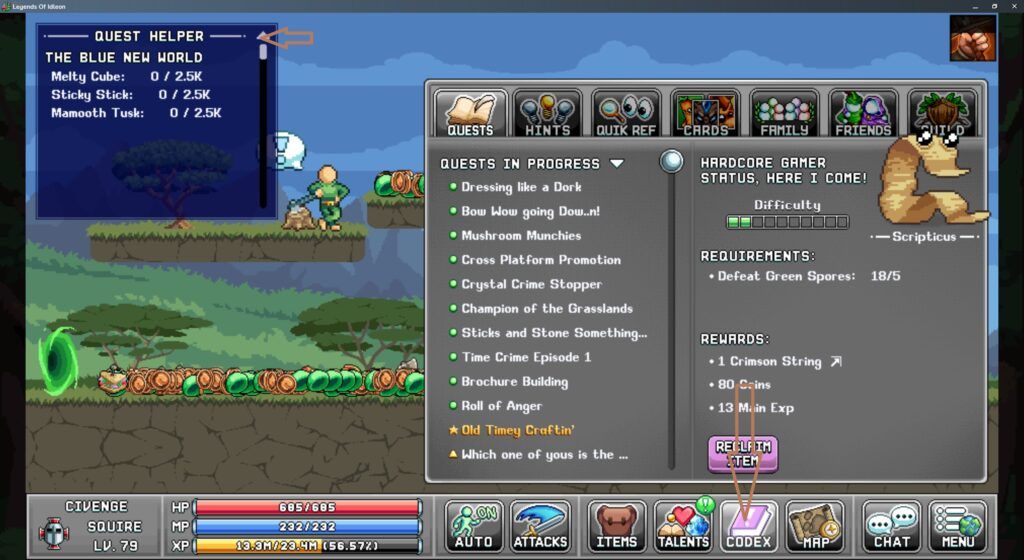
Other important features in here are the ‘Guild’ tab for creating or managing a guild and guild bonuses, and the card system to be talked about in the next section. Really truly spend some time in here understanding what you can do!
Cards
Cards are where you can further customize your character. They are unlocked as random drops from each monster type, as well as from skilling such as ‘Choppin’ or ‘Mining’. Each skilling will give a different type of card on each resource, so copper ore has a different card than iron ore. The main benefit of Cards is they further boost your character stats, whether it be: attack, defense, drop rates, afk gains, etc.
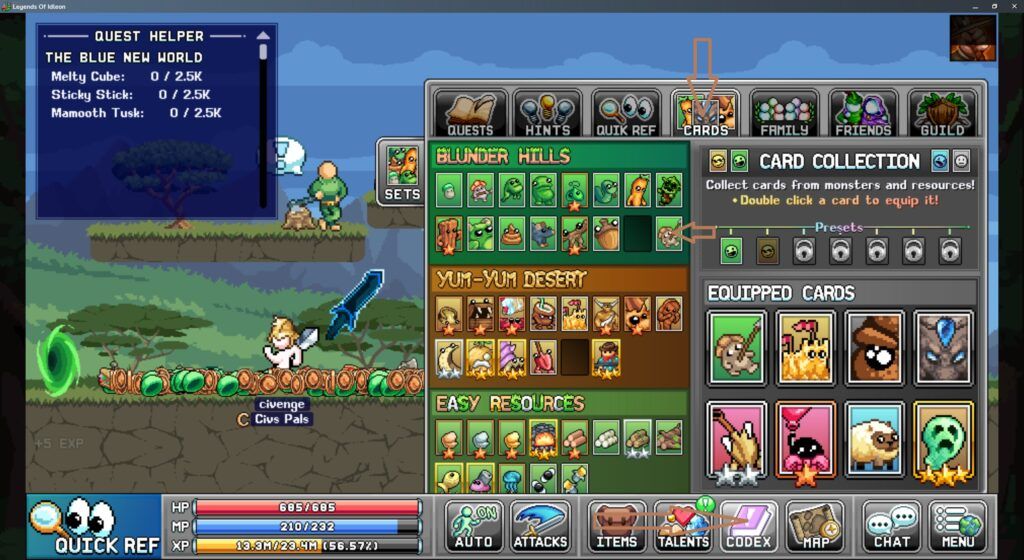
As shown above, hit the ‘Codex’, followed by ‘Cards’ and then all of your card collection is shown by area. Stars next to a card indicate it has ranked up and provides a higher bonus than the base card, with 3 stars being max rank. As you can see, I have 8 equipped cards providing a bunch of different bonuses.
Stamps & Bribes
Stamps & Bribes are another way to scale your character. Stamps drop randomly like cards, and you turn them in to the World 1 Town piggy. Then to utilize the bonuses they require a material to level up followed by money later on. It is a creative way to make returning to old zones viable. Stamps boost all of your characters.
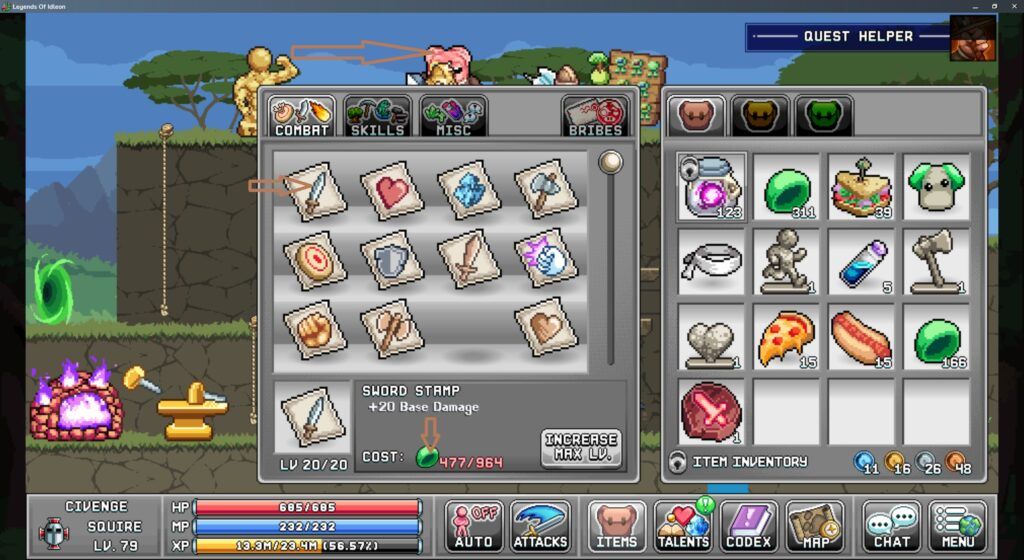
Bribes on the other hand are a money sink. For a set amount of currency, you can purchase a one off boost for all characters. Both stamps and bribes are great to help future characters level up faster.
Statues
Statues are boosts to a single character, at least initially. They are a random drop from mobs and give bonuses based upon the statue type. Note you don’t have statue man unlocked from the start, but will be able to get him through one of the earlier quests. You can see various boosts this character has below:
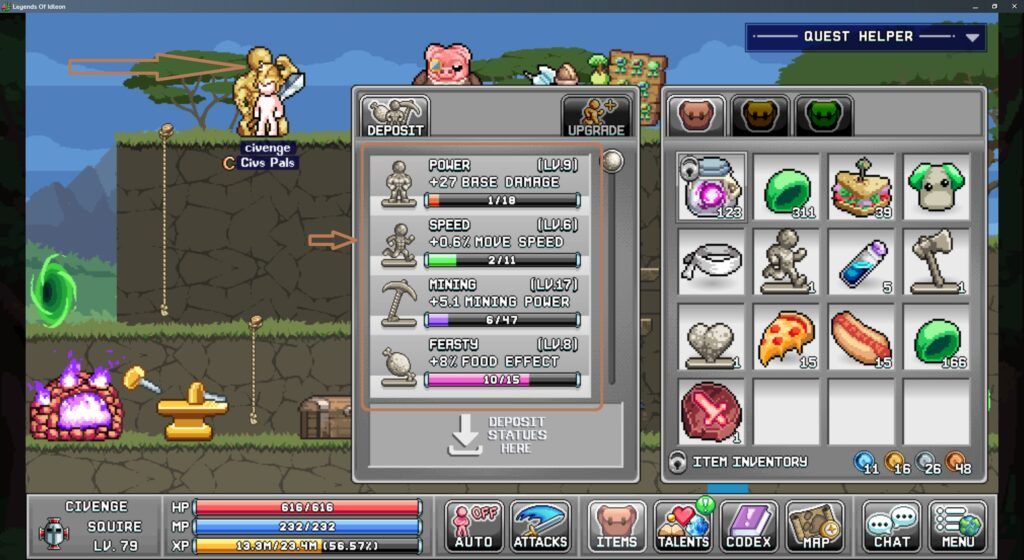
You do have the option of unlocking statues for all your characters to share through the ‘Unlocks’ tab, but it will be too expensive for you as a new player for a long time. Once you’re ‘rolling in it’ then come back and start working on upgrading your statues. Until then, focus more on stamps and bribes.
Obols
Obols come into play in World 2. I’m going to be more vague on them and the Post Office since I don’t want to provide too many spoilers. The main thing to know is Obols are generally earned through ‘Alchemy’ and can be upgraded to provide each character additional boosts. Obol slots unlock as you gain more levels, and there is one tab of shared Obol slots.
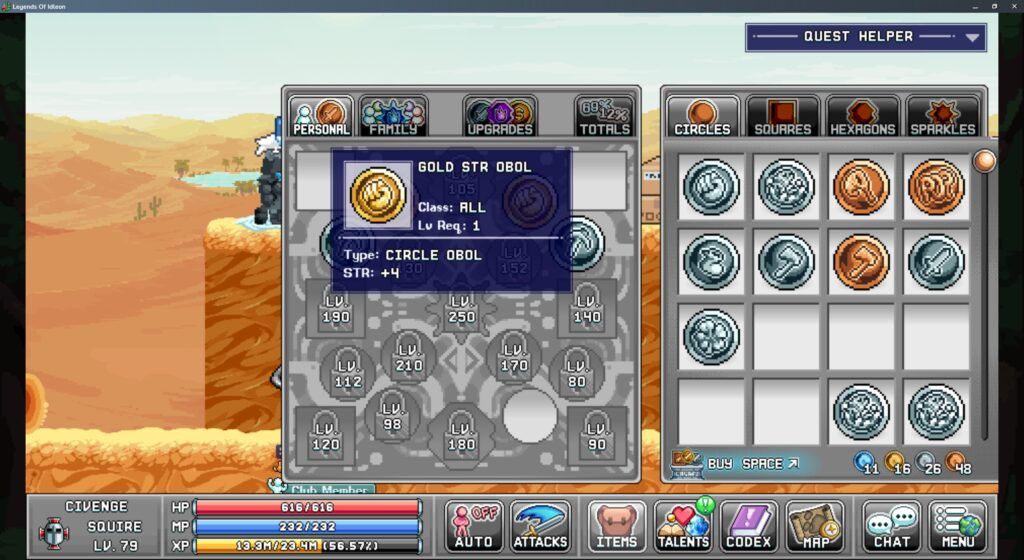
In the image above, you can see I have a ‘Gold Str Obol’ equipped, giving me a bonus of +4 STR. There are also bronze and silver Obols with lesser values. Obols can be combined for a fee of 2 bronze -> 1 silver, 2 silver -> 1 gold. This requires parts and since alchemy is the main way to get Obols, will be a balance on where to spend your alchemy efforts.
Post Office
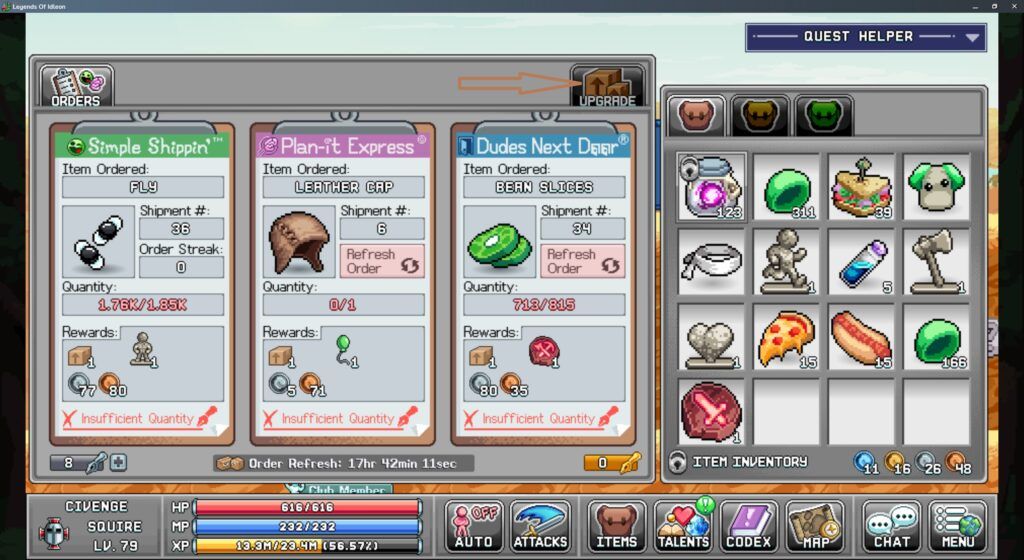
Likewise with Obols, the Post Office is available in World 2. Each day there is the opportunity to complete 3 orders, each giving a reward. In addition, for each order completed, a each character can further spend points to add (very small) bonuses in areas of your choosing. This is one of the smallest bonuses available, but every little bit helps!
Events
Lastly are Holiday Events. These happen at fixed times of the year and can be a great way to improve your account without having to spend real $$$. Typically there are limited things that you can do each day to earn special cards, gems and other goodies. Do them!
Conclusion
This is not an exhaustive guide by any means. When I first starting playing Legends of Idleon, I thought it would be a few hours and then I would get bored. By the 300 hour mark I realized there was a lot to do. Now don’t assume that is 300 hours at the computer. Most of it was what I would call an “active afk” build where I would leave the game running and check in to loot every so often. But the great thing about Legends of Idleon is you don’t even have to do that. So long as you log out doing whatever you want to focus on, whether killing or skillin’, you can log in hours/days/weeks later and still make a lot of progress! For these reasons, I recommend giving it a shot if you haven’t already.
This should give you enough of an overview to cruise through to World 3 without feeling totally lost. I hope you enjoyed the guide!
